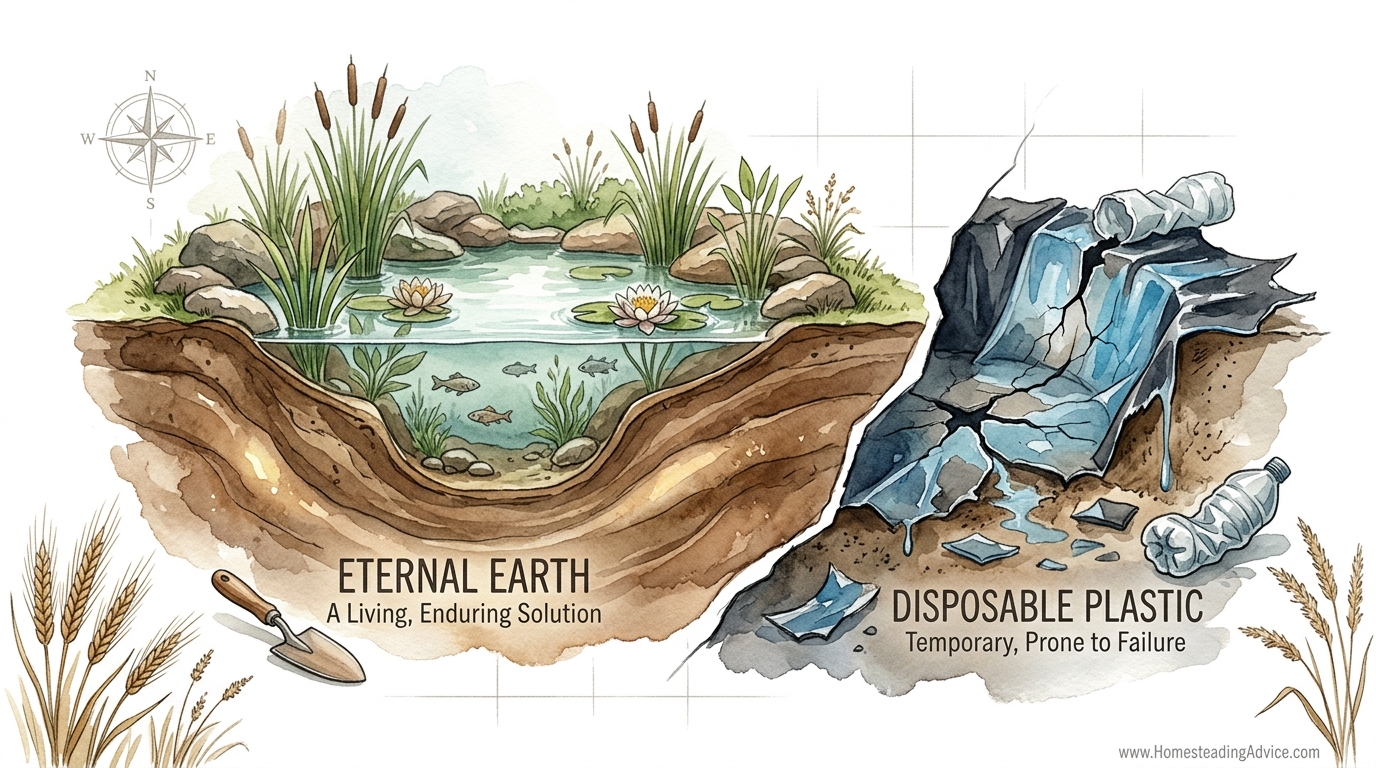
Why did the village ponds of the 1800s last for centuries while your $500 rubber liner is already leaking after five years? We traded ancient geological wisdom for a roll of rubber and an extension cord. Discover the ‘lost’ art of puddling—using raw clay to create a self-healing pond that actually grows stronger with age instead of becoming brittle in the sun. This is how you build a legacy, not a landfill.
Walking through the English countryside or the rolling hills of the American Midwest, you might stumble upon a “dew pond” or a livestock watering hole that has held water since the days of horse-drawn carriages. These water features do not rely on high-tech polymers or UV-stabilized membranes. Instead, they rely on the fundamental properties of the earth itself. When we talk about Eternal Earth vs Disposable Plastic, we are comparing a system that works with gravity and geology against one that fights against the elements until it inevitably fails.
The traditional method of pond building, known as puddling, is a masterclass in self-reliance. It requires no specialized factory equipment, just a deep understanding of your soil and a significant amount of physical labor. By working with the natural materials found right beneath your feet, you can create a water feature that is not only ecologically superior but also practically immortal if maintained correctly. This guide will walk you through the transition from consumer-based pond building back to the ancestral wisdom of the puddled clay pond.
How To Make A Clay Pond
A clay pond is a water-retaining structure where the barrier is formed by a thick, densely compacted layer of clay rather than a synthetic liner. In the world of civil engineering and traditional land management, this material is known as “puddle clay.” Unlike the loose, crumbly clay you might find in a dry garden bed, puddle clay is a processed material—kneaded and compressed until all air pockets are removed and the structure becomes a single, homogenous, waterproof mass.
This technique rose to prominence during the 18th and 19th centuries, most notably used by engineers like James Brindley to line thousands of miles of British canals. It exists because clay is a “plastic” material; when it has the correct moisture content, its microscopic plate-like particles slide over each other and pack together so tightly that water molecules cannot pass through. In real-world situations, clay ponds are the gold standard for wildlife conservation, large-scale agriculture, and historical restoration projects where plastic would be both an eyesore and an environmental liability.
Think of puddled clay as a living skin for the earth. If a small crack forms, the surrounding clay absorbs moisture, swells, and naturally seals the gap. A rubber liner, by contrast, is a static barrier. Once it is punctured by a sharp rock or a persistent tree root, the damage is permanent and often difficult to locate. Making a clay pond is about setting up a biological and geological system that manages itself over the long term.
How It Works: The Principles of Puddling
To understand how to build these structures, you must first understand the “Plastic Limit” of soil. Clay is composed of tiny flat particles that, when dry, are separate and porous. When you add just the right amount of water, these particles become lubricated. Puddling is the mechanical act of “working” this wet clay—traditionally done by driving cattle through the mud or tamping it down with heavy wooden mallets—to align those particles into a waterproof seal.
The process generally follows these fundamental steps:
- Site Assessment: You must determine if your existing subsoil has enough clay content (ideally 20% to 30% or more) to form a seal. If your soil is too sandy, you will need to import “fat” clay or use Bentonite.
- Excavation: The pond is dug with sloping sides. Steep walls are the enemy of clay ponds; they will slump and crack. A 1:3 slope (one foot of rise for every three feet of distance) is a safe standard.
- Layering (Lifts): Clay is not applied in one thick chunk. It is applied in “lifts” of about 15 cm to 20 cm (6 to 8 inches). Each lift is puddled and compacted before the next is added.
- Moisture Control: The clay must be kept at a consistency similar to modeling putty or bread dough. If it is too dry, it won’t seal; if it is too wet, it becomes a slurry that cannot hold its shape.
One of the most common pitfalls for beginners is trying to puddle clay that is too dry. You can test your material by rolling a piece of clay in your hands into a “sausage” about 12 mm (0.5 inches) thick. If you can bend it into a “U” shape without it snapping, it is likely at the correct moisture level for puddling. If it breaks, add water; if it sticks to your hands like glue, let it dry out slightly.
Advantages of a Puddled Clay Pond
Choosing clay over plastic isn’t just a nostalgic whim; it offers measurable practical benefits that modern materials simply cannot match. The most significant advantage is longevity. While an EPDM (Ethylene Propylene Diene Monomer) liner is rated for 20 to 50 years, puddled clay ponds can last for hundreds of years. There are medieval fish ponds in Europe that are still holding water today using the same clay that was puddled into place by hand centuries ago.
Another major benefit is self-healing. Because clay expands when wet, it can often seal minor punctures from roots or shifting soil automatically. In a synthetic pond, a single leak can mean draining the entire pond, removing tons of rock, and searching for a pinhole. In a clay pond, you can often “patch” a suspect area by adding more puddled clay or even broadcasting granular Bentonite into the water, which sinks and seals the leak from the inside.
From an environmental perspective, clay is the superior choice. It is a 100% natural material that does not leach chemicals or microplastics into the ecosystem. It provides a better substrate for aquatic plants to take root, creating a more “natural” look and feel. Furthermore, if you decide to remove the pond in fifty years, you aren’t left with a massive, non-recyclable plastic sheet to haul to a landfill. You simply have a patch of very good, compact soil.
Challenges and Common Mistakes
The biggest challenge is the physical labor involved. Puddling is an exhausting process. In the past, this was accomplished by “puddlers” who would spend all day treading the clay with their bare feet or driving livestock back and forth. For a modern homeowner, this usually means hours of tamping with a hand tool or renting a vibrating plate compactor. Many people underestimate the sheer volume of clay needed; a standard 30 cm (12 inch) lining for a medium-sized pond can require several tons of material.
Mistakes often happen during the drying phase. If a clay pond is allowed to dry out completely—perhaps during a long summer drought—the clay will shrink and develop deep fissures. Once these cracks form, they can be difficult to seal simply by refilling the pond. The water will often run through the cracks faster than the clay can swell to close them. To avoid this, the pond must be kept full, or the clay must be protected by a layer of subsoil and stones to prevent evaporation.
Another frequent error is ignoring the banks. Water is lost most frequently at the edges. If your clay liner stops exactly at the water line, capillary action and evaporation will pull water into the dry surrounding soil. You must “key” the clay liner into the surrounding banks, extending it at least 30 cm to 60 cm (1 to 2 feet) beyond the high-water mark and burying it under a layer of topsoil to keep it moist.
Limitations: When Clay May Not Work
Clay is not a universal solution. If your site is located on highly permeable sand or gravel, and you do not have access to a local source of heavy clay, the cost of importing enough material may be prohibitive. In these scenarios, a synthetic liner or a Bentonite-amended soil might be more practical. Clay also performs poorly on very steep slopes; the material is heavy and, when saturated, it wants to slide toward the bottom of the pond.
Environmental constraints also play a role. If you live in an area with severe, multi-year droughts where you cannot guarantee a minimum water level, a clay pond might be a constant source of frustration. Unlike a plastic liner, which can sit dry in a hole for years (though it will degrade in the sun), a dry clay liner is a broken clay liner. Additionally, if your land is prone to heavy burrowing by animals like muskrats or crawfish, they can tunnel through the clay and create persistent leaks that are difficult to manage.
Comparison: Traditional Clay vs. Modern EPDM
To help you decide which path to take, consider the following comparison of measurable factors. While we advocate for the “Eternal Earth” approach, it is important to be realistic about your resources.
| Feature | Puddled Clay | EPDM Rubber Liner |
|---|---|---|
| Expected Lifespan | 100+ Years | 20–50 Years |
| Material Cost | Low (often free if on-site) | High ($0.75–$1.50 per sq. ft.) |
| Skill Required | Medium (Knowledge of soil) | Low (Follow instructions) |
| Labor Intensity | Very High | Moderate |
| Repairability | Self-healing / Easy patches | Difficult (Requires kits) |
| Environmental Impact | Neutral / Beneficial | High (Plastic waste) |
Practical Tips and Best Practices
If you are ready to start digging, these best practices will significantly increase your chances of success. First, perform a Mason Jar Soil Test. Fill a glass jar one-third full of your soil, add water and a pinch of salt, shake it vigorously, and let it settle for 24 hours. You will see layers of sand, silt, and clay. If the top clay layer is less than 20% of the total volume, you will need to amend your soil with Bentonite or import pure clay.
Another traditional tip is the use of lime. Historically, pond builders would spread a layer of lime (calcium hydroxide) beneath the clay or mix it into the bottom layer. This was believed to deter earthworms and eels from boring through the liner and creating “micro-leaks.” While modern science suggests the compaction itself is the main barrier, the addition of lime can help stabilize certain types of clay and improve the seal.
- Keep it Covered: Once puddled, cover your clay with 10 cm to 15 cm (4 to 6 inches) of clean subsoil or rounded river stones. This protects the clay from UV rays, prevents drying, and keeps livestock or wildlife from poking holes in the liner.
- The “Foot-Print” Method: If you are working by hand, the clay is ready when a deep footprint in the mud holds water without it soaking in immediately.
- Winter Safety: Try to complete your puddling during a cool, damp season. If you puddle clay in the heat of summer, it may dry out and crack before you even finish the project.
Advanced Considerations: Gleying and Bentonite
For those who want to go beyond simple compaction, there are two advanced techniques worth exploring. The first is Gleying, an old Russian biological method. This involves lining the pond with a thick layer of fresh animal manure (pig or cow is best) and covering it with organic matter like grass clippings or leaves. As these materials decompose anaerobically, they create a “slime” or “gley” layer—a biological biofilm that plugs the pores in the soil. While effective, it requires precise timing and can be quite messy.
The second is the use of Sodium Bentonite. If your soil is “almost” good enough but still slightly porous, you can disk or till granular Bentonite into the top 10 cm (4 inches) of your pond basin. Bentonite is a volcanic clay that expands up to 15 times its dry volume when wet. When compacted, it creates an incredibly tight seal that is even more reliable than standard puddle clay. This is often the best compromise for someone who wants a natural pond but has marginally sandy soil.
Example Scenario: The 500-Gallon Wildlife Pond
Imagine you want to build a small wildlife pond about 3 meters (10 feet) across and 60 cm (2 feet) deep. If you used a rubber liner, you would buy a 5-meter by 5-meter sheet, dig the hole, and lay it down. Using the puddling method, you would instead dig the hole slightly deeper—about 90 cm (3 feet)—to account for the thick clay lining. You would then source roughly two cubic meters of heavy clay.
You would spread the first 15 cm (6 inch) layer of clay, spray it lightly with water, and begin treading it down. You would do this until the clay feels like stiff dough. Then, you would repeat the process for a second 15 cm layer. Finally, you would cover the edges with sod and the bottom with a thin layer of pebbles. Within a few days of rain, the pond would fill. Instead of a black plastic rim showing at the edges, you have a soft, natural transition where plants like Marsh Marigolds can thrive directly in the wet clay. This pond won’t just sit in your yard; it will become part of the land’s geology.
Final Thoughts
Building a clay pond is a commitment to a different way of living. It rejects the “buy it and bury it” mentality of modern landscaping in favor of a deeper connection to the earth and a willingness to put in the work. By learning to puddle clay, you are reclaiming a skill that allowed our ancestors to drought-proof their farms and create lasting beauty without a single piece of synthetic material. It is a slow process, but the results are measured in generations, not just years.
We encourage you to start small. Dig a tiny “test pit” in a corner of your garden and experiment with the puddling process. Watch how the soil responds to water, learn the feel of the clay when it reaches its plastic limit, and observe how it holds water over the seasons. Once you understand the rhythm of the earth, you won’t just be building a pond; you will be building a legacy that grows stronger with every passing storm. The “lost” art of puddling is waiting to be rediscovered in your own backyard.