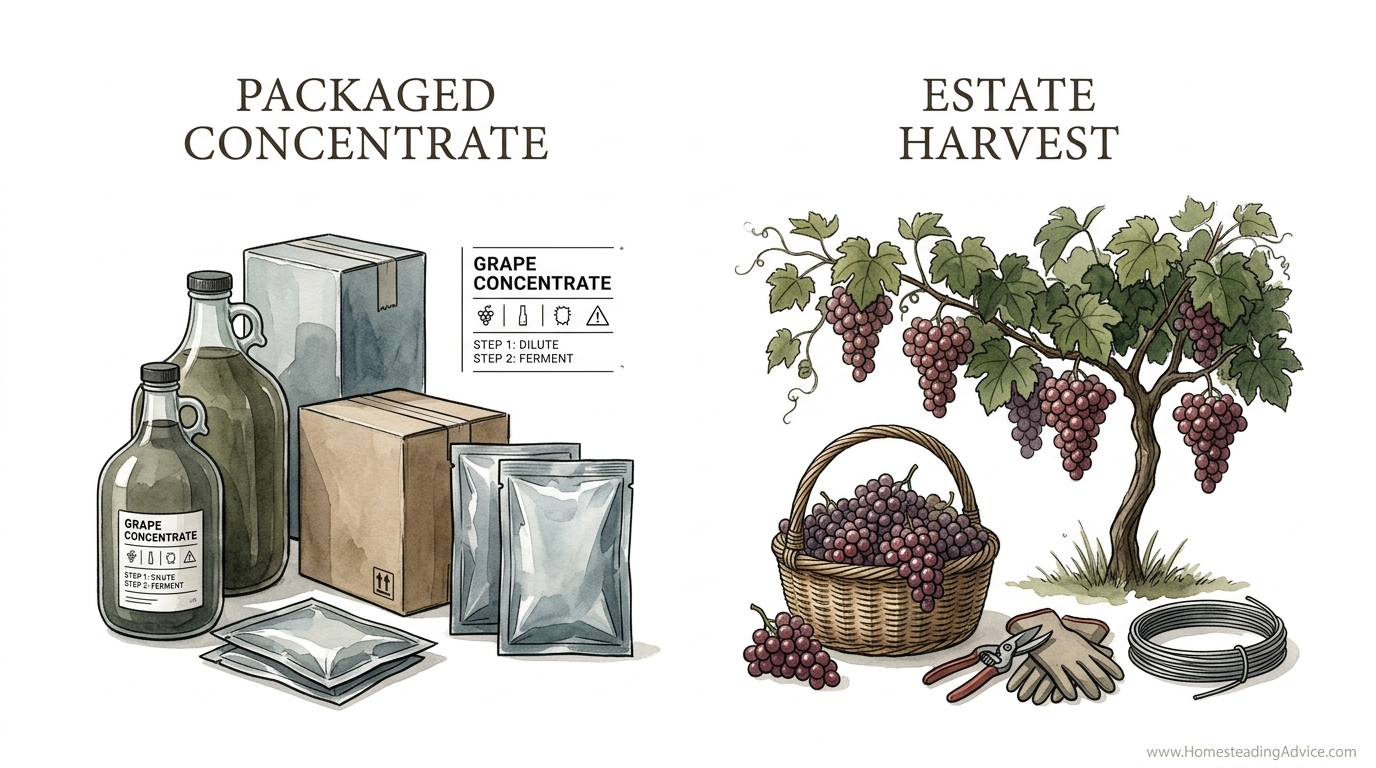
Stop paying $80 for a kit of factory juice when the sun and your soil want to give you a ‘Grand Cru’ for free. There is a massive difference between rehydrating a bag of corporate grape juice and crafting a wine that tastes like your own land. When you move from a consumer of kits to a producer of estate-grown fruit, you aren’t just making a drink – you’re bottling a season. Here is how to turn that empty fence line into your private vineyard.
Most beginners start their winemaking journey with a box from the local homebrew shop. It’s safe, predictable, and clean. But it lacks soul. When you grow the grapes yourself, you are participating in an ancient cycle of weather, soil, and grit. You learn that a rainy Tuesday in July affects the way your wine tastes three years later.
This guide is for those who are ready to put a shovel in the ground. We aren’t talking about decorative arbors. We are talking about a functional, productive backyard vineyard that yields real wine. Whether you have space for five vines or fifty, the principles of viticulture remain the same: respect the soil, manage the canopy, and have the patience to wait for the harvest.
Backyard Vineyard Setup For Beginners
Setting up a backyard vineyard is the process of domesticating a small piece of land to support high-quality wine grapes. Unlike table grapes, which are bred for size and sweetness, wine grapes (Vitis vinifera or hybrids) are bred for complexity, acidity, and tannin. They require a specific environment to reach their potential.
In the real world, a vineyard is a long-term investment. Grapes are perennials, meaning they live for decades. Because you only get one chance to set the foundation, your site selection is the most critical decision you will make. You are looking for a spot with maximum sunlight—at least 6 to 8 hours a day—and excellent air circulation to prevent rot.
Visualize your vineyard not as a garden, but as a system of solar panels. Every leaf is a panel collecting energy to pump sugar into the berries. If your site is shaded by a neighbor’s oak tree or trapped in a low-lying “frost pocket” where cold air settles, your grapes will struggle to ripen, and your wine will taste thin and green.
Assessing Your Site
Look for a slope if you have one. A slight south-facing slope (in the Northern Hemisphere) or north-facing (in the Southern Hemisphere) is the “Grand Cru” of backyard layouts. Slopes allow cold air to “drain” away like water, protecting your tender spring buds from late-season frosts. If your land is flat, don’t worry—you can still grow great grapes, but you’ll need to be more vigilant about airflow and drainage.
Choosing the Right Grape for Your Land
You cannot force a grape to grow where it doesn’t belong. The most common mistake is trying to grow Cabernet Sauvignon in a rainy, cold climate just because you like drinking it. Success starts with matching the cultivar to your “Growing Degree Days” (GDD), which is a measure of the heat your site receives during the season.
Vitis Vinifera: These are the classic European grapes like Merlot, Pinot Noir, and Chardonnay. they produce the finest wine but are picky. They generally require moderate to warm climates and have low resistance to diseases like powdery mildew. Most are hardy only to about 0°F to -10°F (-18°C to -23°C).
French-American Hybrids: If you live in a region with brutal winters or high humidity (like the U.S. Midwest or Northeast), look at hybrids. Varieties like Marquette, Frontenac, or Baco Noir are “pioneer-grit” grapes. They can survive temperatures as low as -30°F (-34°C) and have built-in resistance to many common vineyard plagues.
Native American Grapes: Grapes like Concord or Niagara are incredibly hardy and vigorous. While they are often used for jelly or juice, they can make unique “foxy” flavored wines. However, for serious dry table wine, most growers stick to Vinifera or high-quality hybrids.
Soil Preparation: The Foundation of Flavor
Grapevines are one of the few plants that actually thrive in “poor” soil. If your dirt is too rich in nitrogen, the vine will grow massive amounts of leaves (canopy) but forget to put effort into the fruit. You want your vines to struggle just a little bit.
Before you dig, get a soil test. You are looking for three main things:
- pH Levels: Most wine grapes prefer a pH between 6.0 and 7.0. If your soil is too acidic (below 5.5), you’ll need to add lime. If it’s too alkaline, you might need sulfur.
- Drainage: Grapes hate “wet feet.” If water stands in your yard for hours after a rain, you must install drainage tiles or build up raised berms. Saturated roots will rot and kill the vine.
- Nutrients: While grapes don’t need much, they do require Phosphorus (P), Potassium (K), and Magnesium (Mg). Use organic compost or slow-release organic amendments rather than harsh synthetic fertilizers that cause “veggie” growth.
Building the Skeleton: Trellis Construction
A grapevine is a liana—a climbing vine. Left to its own devices, it will crawl across the ground and produce a tangled mess of sour fruit. A trellis is the skeleton that holds the vine up to the sun and organizes the fruit for easy picking.
For a backyard setup, the Vertical Shoot Positioning (VSP) system is the gold standard for most wine grapes. It keeps the fruit in a neat “fruiting zone” about 30 to 36 inches (76-91 cm) off the ground, with the leaves growing straight up between “catch wires.”
Trellis Materials and Specs
Do not skimp on your trellis. A mature vine laden with fruit can weigh 30 to 50 pounds (13-22 kg). In a high wind, your trellis becomes a sail. Use the following specifications for a professional-grade setup:
| Component | Specification | Purpose |
|---|---|---|
| End Posts | 5-6″ diameter pressure-treated wood | Anchors the entire row; set 3-4 feet deep. |
| Line Posts | 3-4″ diameter wood or steel T-posts | Supports the weight between end posts; spaced 20-24 feet apart. |
| Wire | 12.5 gauge high-tensile galvanized | The “fruiting wire” that carries the bulk of the weight. |
| Anchors | Screw-in earth anchors or H-Braces | Keeps the end posts from leaning inward under tension. |
The H-Brace: If you have the space, an H-Brace is the strongest way to finish a row. It consists of two vertical posts with a horizontal cross-member and a diagonal tension wire. This prevents the heavy fruit load from pulling your end posts out of the ground over time.
How to Plant Your Vineyard
In most regions, planting happens in early spring while the vines are still dormant. You will usually buy “bare-root” dormant vines from a reputable nursery. These look like dead sticks with a bunch of dried-out roots, but they are full of life.
Spacing: For a backyard vineyard, space your vines 6 to 8 feet (1.8 – 2.4 meters) apart within the row. Your rows should be 8 to 10 feet (2.4 – 3 meters) apart. This gives you enough room to walk or move a small mower between them without snagging your clothes.
The Planting Process: Dig a hole deep enough to spread the roots out naturally. Do not “J-root” them (folding the roots upward to fit the hole). Trim any excessively long roots to about 6 inches (15 cm). Plant the vine so the “graft union”—that knobby bump where the grape variety meets the rootstock—is 2 to 3 inches (5-8 cm) above the soil line. If you bury the graft, the top part of the vine will grow its own roots, and you’ll lose the benefits of the phylloxera-resistant rootstock.
The Four-Year Journey to Your First Glass
Establishing a vineyard requires a “pioneer’s patience.” You cannot rush the vine. If you let a young vine produce fruit too early, you will stunt its root system and shorten its lifespan.
Year 1: Building the Engine (Roots)
In the first year, your goal is root development. When the vine starts growing, select the strongest shoot and tie it to a stake. Cut off any fruit clusters that appear. It feels like a sin to throw away grapes, but you want all that energy going into the roots and a single straight trunk.
Year 2: Building the Infrastructure (Trunk and Cordons)
During the second dormant season (winter), prune the vine back to the height of your fruiting wire. In the spring, you will train two shoots to grow horizontally along the wire—these are called your cordons. Again, remove any fruit. You are still building the skeleton.
Year 3: The “Discovery” Harvest
By year three, the vine has a established trunk and cordons. You can finally allow a small amount of fruit to ripen—perhaps 2 to 5 pounds (1-2 kg) per vine. This is your first taste of your land’s terroir. Use this year to practice your fermentation techniques.
Year 4 and Beyond: Full Production
By the fourth or fifth year, your vines are “mature.” You can now expect a full crop, typically 10 to 15 pounds (4.5 – 6.8 kg) per vine. For a standard 5-gallon (19-liter) batch of wine, you will need about 75 to 90 pounds (34-41 kg) of grapes, which means a small backyard vineyard of 8 to 12 vines is the perfect size for a hobbyist.
The Art of the Cut: Pruning and Training
Pruning is the most important task in the vineyard. It happens during the winter when the vines are dormant. You will remove 80% to 90% of the previous year’s wood. There are two primary methods:
Cane Pruning (Guyot System): Every year, you remove the old cordons and lay down a fresh “cane” from the previous season’s growth. This is common in cooler climates because it’s easier to protect the vine from frost and ensures “fruitfulness” in varieties that don’t produce well from the first few buds.
Spur Pruning (Cordon System): You keep the permanent horizontal cordons and prune the shoots growing off them into short “spurs” with only 2 buds each. This is easier for beginners to learn and creates a very organized, aesthetic vineyard look. It works best for vigorous varieties and warmer climates.
The Golden Rule of Pruning: You are aiming for a specific “bud count.” For a typical wine grape, you want to leave about 20 to 30 buds per vine. If you leave too many, the vine will overproduce, and the grapes will never get sweet enough to make good wine.
Benefits of the Estate Harvest
Moving from kits to estate fruit changes your relationship with wine. You gain total control over the process, from the chemistry in the soil to the moment of the crush.
- Authenticity: Your wine will have a unique flavor profile that exists nowhere else. This is the true definition of terroir.
- Tannin and Structure: Kit wines often lack the “mouthfeel” of commercial wines because they are made from concentrated juice. When you ferment on real skins (for reds), you extract complex phenolics and tannins that provide aging potential.
- Food Security and Self-Reliance: There is a profound sense of ancestral wisdom in knowing you can produce a high-value product from your own backyard using nothing but sun and rain.
Challenges and Common Mistakes
The vineyard is a battlefield. Nature wants your grapes as much as you do. Here are the most common pitfalls for beginners:
1. The “Bird Tax”: Once your grapes turn color (veraison), every bird in the county will descend. If you don’t use bird netting, you will lose 100% of your crop in 48 hours. Net your vines as soon as the berries start to soften.
2. Over-Irrigation: Beginners often treat grapes like tomatoes, watering them every day. This creates “watery” berries and encourages fungal diseases. Mature vines need deep, infrequent watering—perhaps once every 10 to 14 days during a dry spell. If the leaves aren’t drooping, the vine is fine.
3. Missing the Spray Window: Fungal diseases like Powdery Mildew and Black Rot are easier to prevent than to cure. If you live in a humid climate, you must have a preventative spray schedule (using organic options like sulfur or potassium bicarbonate) starting from the time the shoots are 3 inches long.
Limitations: When a Backyard Vineyard May Not Work
While grapes are resilient, there are some situations where a vineyard is a losing battle. If your backyard is in a deep, shaded canyon with only 3 hours of light, you will never get ripe fruit. Similarly, if your soil is pure heavy clay with zero drainage, your vines will likely die of “wet feet” within three years.
Climate change is also a factor. If you live in a region that regularly sees “Polar Vortex” events with temperatures below -25°F (-31°C), you are limited to the most extreme cold-hardy hybrids. Trying to grow classic Cabernet in Minnesota is a recipe for heartbreak.
Packaged Concentrate vs. Estate Harvest
It is helpful to understand exactly what you are gaining when you move away from the “corporate juice” kits. While kits are convenient, they are a different animal entirely.
| Feature | Packaged Kit (Concentrate) | Estate Harvest (Fresh Grapes) |
|---|---|---|
| Cost per Bottle | $3.00 – $6.00 | $0.50 – $1.00 (After setup costs) |
| Skill Level | Beginner (Follow instructions) | Intermediate to Advanced |
| Flavor Depth | Standardized, predictable | Variable, complex, site-specific |
| Time Commitment | 4-6 weeks to bottle | 1 year (Growing) + 1-2 years (Aging) |
| Tannin Structure | Low (Often chemically added) | High (Natural skin contact) |
Practical Tips and Best Practices
- Keep a Vineyard Log: Record the date of bud-break, bloom, and veraison. Note any frost events or heavy rains. This data becomes your most valuable tool for predicting future harvests.
- Weed Management: Competition for water is fierce. Keep a 3-foot (1-meter) wide strip under your vines free of grass and weeds. Mulching helps, but avoid piling it against the trunk, which can encourage rot.
- Shoot Thinning: In early summer, if your canopy looks like a jungle, remove “non-fruiting” shoots. You want a “wall of leaves” that is only 1 or 2 layers thick so the wind can blow through and dry out the clusters.
- Leaf Pulling: A few weeks before harvest, pull the leaves immediately surrounding the grape clusters. This allows sunlight to hit the fruit directly, which helps “burn off” green, bell-pepper flavors (methoxypyrazines) in red grapes.
A Tale of Two Hemispheres: Timing Your Year
Viticulture is a global craft, but the calendar is flipped depending on where you stand on the Earth. If you are reading advice from a grower in France, and you are in Australia, you need to adjust your timing by six months.
Northern Hemisphere (USA, Europe, China): Pruning happens in January-March. Harvest typically falls in August-October.
Southern Hemisphere (Argentina, Australia, South Africa): Pruning happens in July-September. Harvest typically falls in February-April.
Regardless of the month, the triggers are the same: the vine “wakes up” when soil temperatures reach 50°F (10°C) and goes dormant after the first hard freeze in autumn.
Advanced Considerations: Measuring Ripeness
For the serious practitioner, knowing when to pick is a science. You don’t just “guess” when they look purple. You need two inexpensive tools: a Refractometer and a pH Meter.
Brix (Sugar): Most red wine grapes should be picked between 22 and 25 Brix. Whites can be picked slightly lower, around 20-22 Brix, to preserve acidity. If you pick at 18 Brix, your wine will be thin and low in alcohol.
pH and TA (Acidity): Sugar is only half the story. You want a pH between 3.2 and 3.6 for reds. If the pH climbs too high (above 3.8), the wine will be “flat” and susceptible to bacterial spoilage. Finding the balance between high sugar and “bright” acidity is the ultimate goal of the backyard viticulturist.
Example Scenario: The “Fence-Line Five”
Imagine a homeowner with a 40-foot (12-meter) sunny fence line. They decide to plant five Merlot vines. By spacing them 8 feet apart, they fill the space perfectly.
In Year 1, they focus on a single trunk per vine. In Year 2, they grow two 4-foot cordons per vine. By Year 4, each vine produces roughly 12 pounds of fruit. This results in 60 pounds of estate Merlot grapes. After crushing and pressing, they yield approximately 4 gallons (15 liters) of wine—roughly 20 bottles. For a total investment of a few hundred dollars in posts and wire, they now have a perennial supply of “private reserve” wine that rivals $30 boutique bottles.
Final Thoughts
Establishing a backyard vineyard is one of the most rewarding ways to reclaim a sense of self-reliance. It is a hobby that forces you to slow down and observe the world. You begin to notice the angle of the sun in September and the specific way the wind moves through your yard.
While the learning curve is steeper than a kit, the payoff is immeasurably higher. You aren’t just drinking a beverage; you are consuming the distilled essence of a year of your life on your land. Start small, build your trellis strong, and don’t be afraid to get your hands in the dirt. Your first bottle of estate-grown wine will be the best one you’ve ever tasted, not because it’s perfect, but because it’s yours.
Once you master the vineyard, the cellar is the next step. Every season will offer a new challenge, and every vintage will tell a new story. Welcome to the life of the grower.