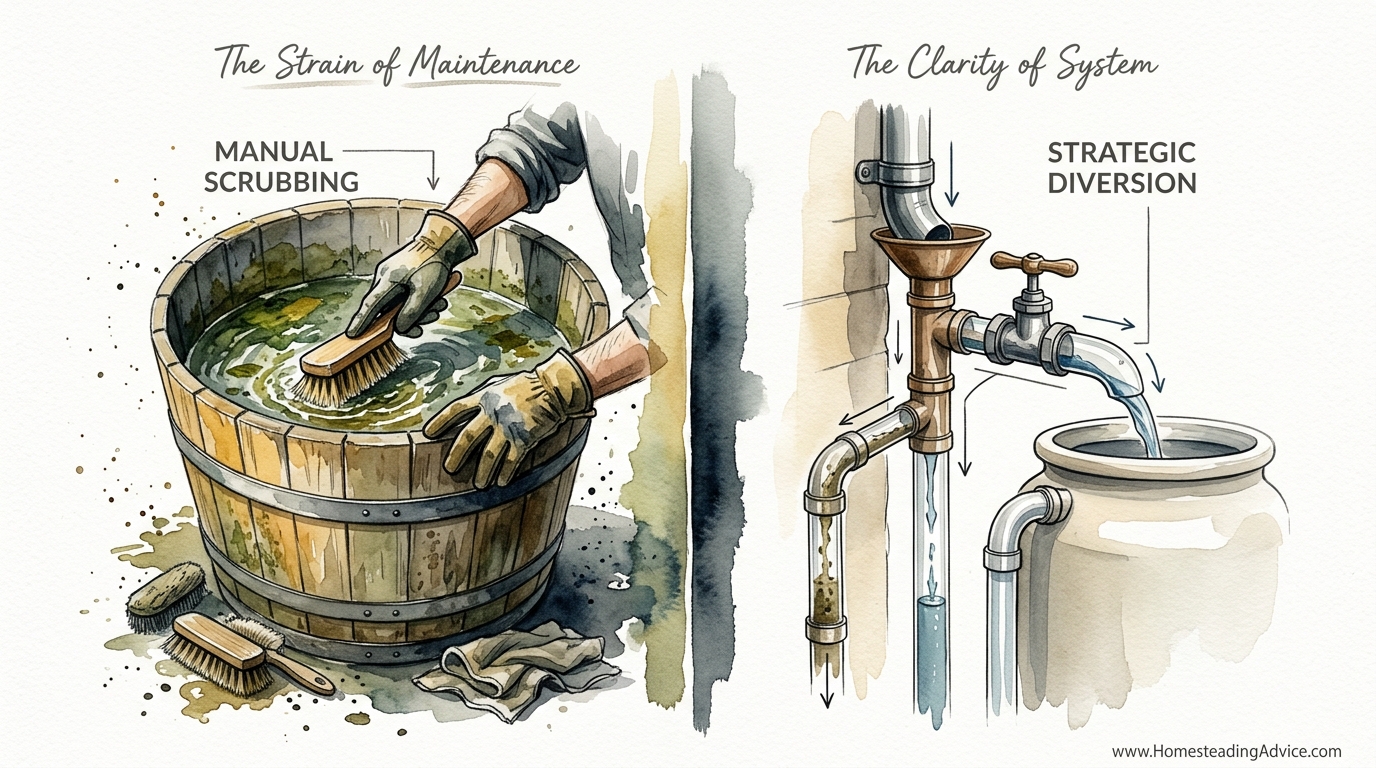
The dirtiest part of your rainwater isn’t coming from the sky; it’s the first five minutes of the storm sitting on your roof. If you’re still spending your weekends scrubbing slime out of your water tanks, you’re fighting a losing battle. The ‘First Flush’ method uses simple physics to let the rain wash your roof for you, automatically dumping the bird droppings and dust before they ever reach your storage. Work smarter, not harder.
The logic is simple: the longer the dry spell, the more grit accumulates. Between rain events, your roof serves as a landing pad for everything from windblown dust and industrial soot to bird droppings and decomposed insects. When the clouds finally break, that initial torrent of water acts as a high-pressure wash, scouring the surface and carrying every ounce of that filth straight toward your downpipes.
If you don’t have a way to intercept that “first flush,” you are effectively turning your water tank into a settling pond for pathogens and sediment. While many people turn to expensive, high-maintenance filters to solve this, the most reliable solution is a mechanical one that relies on the weight and volume of the water itself to do the heavy lifting.
How To Keep Rainwater Clean Without Filters
Keeping rainwater clean without the constant expense of replaceable filters relies on a principle called source separation. Instead of trying to catch debris once it is already in your tank, you design the system to reject the most contaminated water before it ever enters the reservoir. This is primarily achieved through a first flush diverter—a simple, vertical chamber installed along your downpipe.
This method exists because traditional filters often become the very breeding ground for the bacteria they are meant to stop. A filter trapped in a dark, wet pipe will eventually clog with organic matter, creating a “sludge” that can actually worsen water quality over time. By contrast, a first flush system uses divergent physics to isolate the initial wash.
In the real world, this is used everywhere from remote homesteads to large-scale organic farms. Think of it like washing a muddy car; you wouldn’t want to save the first bucket of soapy, grit-filled water. You spray the mud off first, and only once the water runs clear do you bother trying to catch it. The first flush diverter is the “pre-wash” for your home’s water supply, ensuring that the water entering your tank is as close to pure rain as possible.
How the First Flush System Works
The mechanics of a first flush diverter are remarkably elegant. The system is essentially a T-junction placed in your downpipe. One path leads to your water tank, while the other leads straight down into a vertical pipe known as the diversion chamber.
As the rain begins, gravity pulls the water into the lowest point of the system—the diversion chamber. Because this pipe is empty, it fills up first. Inside the pipe is a buoyant ball (often made of high-density plastic or even a simple float). As the water level in the chamber rises, the ball floats on top.
Once the diversion chamber is full, the ball reaches the top and presses against a “seat” or seal at the T-junction. This effectively caps the pipe. With the dirty “first flush” trapped in the chamber, the subsequent cleaner rainwater has nowhere else to go but through the horizontal branch of the T-junction and into your storage tank.
To reset itself, the bottom of the diversion chamber features a weep hole or a slow-release valve. This allows the dirty water to slowly drip out over several hours. By the time the next storm arrives, the chamber is empty and ready to wash the roof again.
Benefits of Strategic Diversion
Choosing a first flush system over a purely filtration-based approach offers several measurable advantages for the long-term homesteader or homeowner.
* Reduced Maintenance: Without a diverter, sediment settles at the bottom of your tank, forming a thick layer of anaerobic sludge. This requires you to drain and scrub the tank every year or two. With a properly sized diverter, you might only need to clean your tank once every decade.
* Pathogen Reduction: Studies have shown that the first flush can contain significantly higher concentrations of bacteria like Salmonella and E. coli compared to the water that follows. Diverting just the first 1.2 mm (0.05 inches) of rain can remove up to 90% of these surface contaminants.
* Protection for Pumps: If you use a pump to distribute your rainwater, sediment is your greatest enemy. Fine grit acts like sandpaper on internal impellers. Cleaner water significantly extends the life of your mechanical hardware.
* Simplicity: There are no moving parts that require electricity or complex sensors. It is a set-it-and-forget-it system that works as long as gravity exists.
Calculating the Proper Diversion Volume
A common pitfall is building a diverter that is too small. If your roof is 1,000 square feet (approx. 93 square meters) and you only divert one gallon (3.8 liters), you aren’t actually cleaning the roof; you’re just catching the dust from the first few shingles.
The general rule of thumb depends on your environment. In a “clean” environment with little dust and no overhanging trees, you should divert 0.5 gallons per 100 square feet (2 liters per 10 square meters) of roof area. In a “dirty” environment with heavy bird activity, industrial soot, or nearby dirt roads, you should increase this to 2.0 gallons per 100 square feet (8 liters per 10 square meters).
To calculate the length of pipe you need for your diversion chamber, use the following guide based on standard 4-inch (100mm) PVC pipe:
- 4-inch (100mm) PVC pipe holds approximately 0.65 gallons per foot (8.1 liters per meter).
- 3-inch (75mm) PVC pipe holds approximately 0.37 gallons per foot (4.6 liters per meter).
If you have a 1,500 square foot roof in a moderately dusty area, you might want to divert 15 gallons. Using a 4-inch pipe, you would need roughly 23 feet (7 meters) of total diversion chamber length. This can be split across multiple downpipes to make it manageable.
Common Mistakes to Avoid
Even a simple system can fail if the basic physics are ignored. The most frequent error is the clogged weep hole. Because the first flush contains the most debris, the tiny hole at the bottom of the pipe is prone to getting plugged by pine needles or small leaves. If this happens, the chamber remains full of water, and the next rainstorm will carry the roof’s filth directly into your tank because there is no room left in the diverter.
Another mistake is undersizing the downpipe. If the pipe leading into the diverter is too narrow, a heavy downpour can create a “bypass” effect where the velocity of the water carries it straight past the diversion T-junction and into the tank before the chamber has a chance to fill.
Finally, ensure you have a leaf eater or rain head installed above the diverter. This is a slanted mesh screen that ejects large leaves and twigs before they even enter the pipe. If you rely on the first flush chamber to catch large debris, it will fill up almost instantly, rendering the system useless.
Limitations and Realistic Expectations
While the first flush method is highly effective, it is not a magic bullet. It is designed to handle surface-level particulate matter and biological contaminants. It cannot remove dissolved chemicals or heavy metals that might be leaching from certain types of roofing materials.
For example, if you have an old roof with lead flashing or certain asphalt shingles that leach polycyclic aromatic hydrocarbons (PAHs), a first flush will reduce the concentration but won’t make the water safe for drinking without further treatment. Likewise, in areas with extreme air pollution or “acid rain,” the contamination is in the raindrops themselves, not just on the roof. In these cases, the first flush is merely the first step in a multi-stage treatment process.
Manual Scrubbing vs. Strategic Diversion
| Factor | Manual Scrubbing | Strategic Diversion |
|---|---|---|
| Labor Intensity | High (Annual deep clean) | Low (Occasional valve check) |
| Initial Cost | Zero | Moderate ($50 – $150 USD) |
| Water Quality | Inconsistent (Sludge builds up) | Consistently High |
| System Lifespan | Shorter (Pump/Tank wear) | Longer (Clean environment) |
Practical Tips for Best Performance
To get the most out of your setup, consider the orientation of your pipes. Always install the diversion chamber vertically. Horizontal pipes don’t allow the sediment to settle properly and often lead to “dead zones” where bacteria can thrive.
Use transparent or removable end caps at the bottom of your diverter. This allows you to quickly see if the weep hole is blocked without having to disassemble the entire unit. A quick twist of the cap once every few months to flush out the collected sediment is all the maintenance most systems need.
If you live in a region that experiences freezing temperatures, you must include a seasonal drain-down plan. A first flush chamber full of water will crack in a hard freeze. Either install a large-diameter drain valve that you can leave open during the winter or remove the chamber entirely during the coldest months.
Advanced Considerations
For those looking to optimize further, consider the multi-stage diversion technique. This involves using a coarse screen at the gutter (Gutter Guard), a secondary fine mesh at the downpipe (Rain Head), and finally the First Flush Diverter. This “triple-threat” approach ensures that even fine pollen and microscopic dust are drastically reduced.
Serious practitioners might also look into automated solenoid valves. These systems use a moisture sensor or a timer to hold the first flush and then dump it rapidly after a set period. While this adds complexity and requires power, it allows for much larger diversion volumes—useful for industrial-sized roofs where a standard PVC pipe would be too small to act as a chamber.
A Realistic Scenario
Imagine a homestead in a semi-arid region. It hasn’t rained for six weeks. The roof is covered in a fine layer of alkaline dust and several patches of dried bird droppings. A sudden thunderstorm arrives, dropping 0.5 inches (12.7 mm) of rain in twenty minutes.
Without a diverter, that first half-inch of rain carries roughly 5 pounds (2.2 kg) of dissolved solids and pathogens directly into a 2,500-gallon (9,500-liter) tank. The water turns murky, and within days, a biofilm begins to grow on the tank walls.
With a 15-gallon (57-liter) first flush diverter installed, that initial high-concentration “soup” is trapped in the PVC chamber. By the time the chamber is full (which takes about 2 minutes of heavy rain), the roof is mostly clean. The remaining 18 minutes of rainfall—roughly 800 gallons (3,000 liters)—enters the tank crystal clear. The homesteader only has to occasionally check that the bottom valve is dripping, ensuring the system is ready for the next dry spell.
Final Thoughts
The first flush method is a testament to the idea that the best solutions are often the simplest. By understanding the behavior of water and the reality of roof contamination, you can stop fighting the symptoms of dirty water and start addressing the cause. It is a one-time investment in hardware that pays dividends in every glass of water you drink and every appliance you run.
Relying on “ancestral wisdom” doesn’t mean ignoring modern materials like PVC; it means applying the timeless principles of self-reliance to the tools we have today. A clean tank is the foundation of a resilient home. Whether you are building a new system or retrofitting an old one, prioritize the diversion of that first wash.
Start small if you must, but start now. Install a diverter on your primary downpipe and watch the results. When you see the grey, murky water dripping out of that weep hole while the water in your tank remains clear, you’ll know that you’ve finally stopped fighting the rain and started making it work for you.