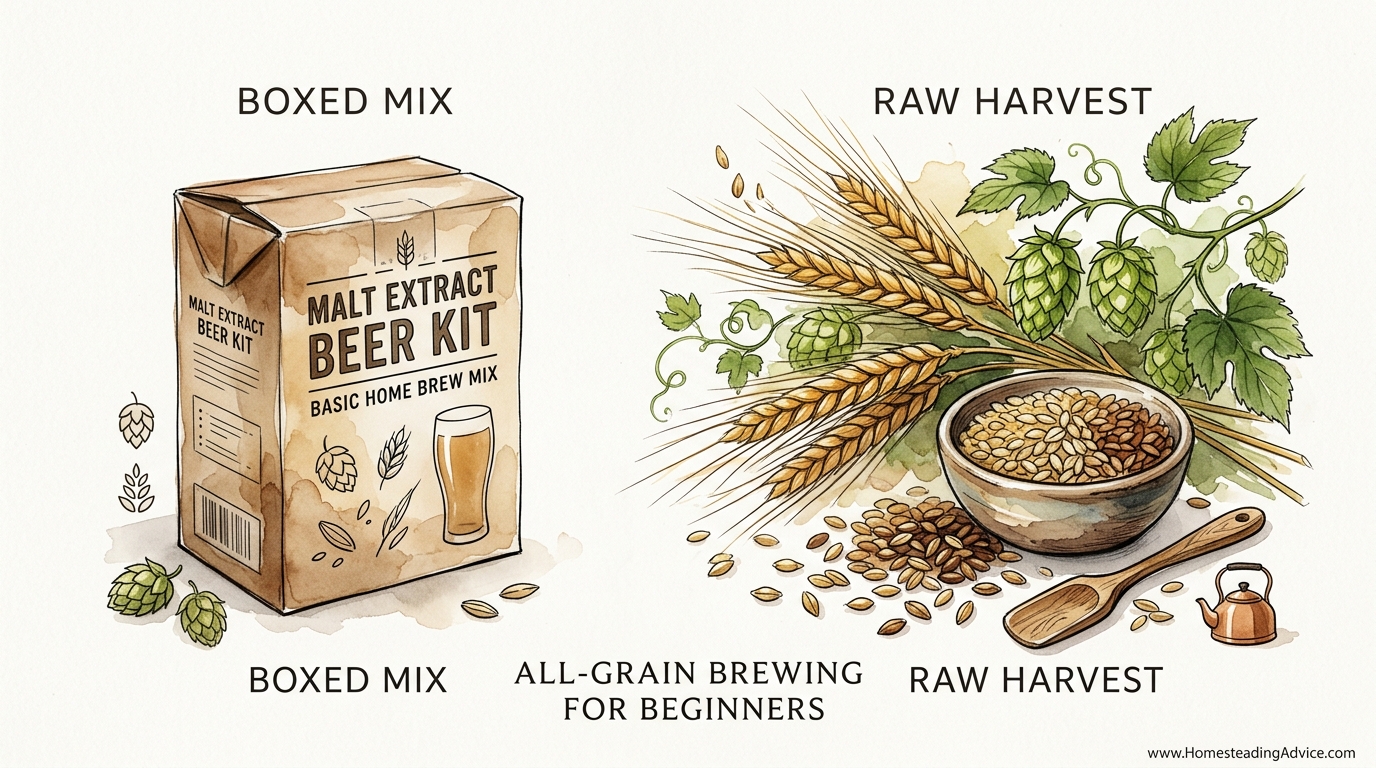
Are you just following a recipe, or are you the master of the grain? Extract brewing makes you a consumer of a factory’s process. All-grain brewing makes you a producer. When you start with raw barley, you control the body, the color, and the soul of your beer. Stop paying for the factory’s leftovers and start crafting from the source.
Stepping into the world of all-grain brewing is like moving from a boxed cake mix to a raw harvest in the kitchen. It is the difference between assembling someone else’s components and building something from the ground up. This method allows you to select the exact barley variety, dictate the mash chemistry, and decide exactly how much body and sweetness your final pint will possess.
Making the leap can feel daunting, as if you are relearning the laws of physics. However, the principles are as old as civilization itself. You are essentially soaking crushed seeds in hot water to wake up sleeping enzymes. Those enzymes do the heavy lifting, turning hard starches into the sweet liquid that yeast will eventually transform into beer.
Every legendary brew you have ever tasted began as a pile of grain. This guide is designed to strip away the jargon and provide a clear, grit-filled path toward mastering the grain. Whether you are working with a high-tech electric system or a simple pot and a bag, the goal remains the same: self-reliance and a superior product.
All-Grain Brewing For Beginners
All-grain brewing is the traditional method of making beer using only raw ingredients: malted barley (or other grains), water, hops, and yeast. Unlike extract brewing, where a commercial facility has already performed the mashing and dehydration for you, all-grain brewing requires you to perform the starch-to-sugar conversion in your own kitchen or garage. This is the “raw harvest” of the brewing world.
This method exists because it offers the highest level of customization. In a factory-made extract, the fermentability is fixed. You cannot change how dry or sweet that beer will be. When you brew all-grain, you control the temperature of the soak, which directly influences whether the beer will be light and crisp like a summer lager or thick and chewy like a winter stout. It is the ultimate tool for the precision-minded craftsman.
In real-world terms, all-grain brewing is used by every professional craft brewery on the planet. They do not use syrups or powders because the cost is too high and the quality is too limited. By adopting this method at home, you are aligning your process with the greats. You are moving away from “beer kits” and toward actual recipe design.
Think of the malted grain as your fuel. It contains the potential energy (starch) and the tools (enzymes) needed to release it. Your job is to provide the environment—the specific temperature and water volume—to let those tools work. Once you understand the “why” behind the mash, the “how” becomes second nature.
The Master’s Toolkit: Equipment for All-Grain
Gathering the right gear is the first step toward independence. While you can spend thousands on shiny stainless steel, the ancestors brewed in wooden vats and clay pots. Your equipment needs to perform three basic functions: heating water, soaking grain (mashing), and boiling the resulting liquid (wort).
The Brew-In-A-Bag (BIAB) Method
Modern beginners often start with the BIAB method because it requires the least amount of extra hardware. You only need one large kettle and a fine-mesh polyester bag. The bag acts as your “mash tun,” holding the grain while it soaks and then acting as a giant tea bag that you lift out when the soak is finished. This is the most efficient path for space-constrained brewers.
The Traditional Three-Vessel System
Traditional setups use three separate containers. The first is the Hot Liquor Tank (HLT), used to heat and hold your water. The second is the Mash Tun, typically an insulated cooler or a dedicated pot where the grain and water mix. The third is the Brew Kettle, where the final liquid is boiled. This setup allows for larger batches and more precise control over the “rinsing” of the grain, though it takes up more floor space.
Essential Measuring Tools
Precision is the difference between a fluke and a masterpiece. You will need a high-quality digital thermometer that reads instantly, as being off by even 2°C (roughly 4°F) can fundamentally change the beer’s profile. A hydrometer or refractometer is also mandatory to measure the sugar concentration, ensuring you hit your target gravity. Without these, you are just guessing in the dark.
The Alchemy of the Mash: How It Works
Mashing is where the magic happens. This is the process of mixing crushed malted grain with hot water to convert starches into fermentable sugars. It is an enzymatic reaction that relies entirely on temperature control. If the water is too cold, the enzymes stay asleep; if it is too hot, you kill them instantly.
Alpha-amylase and Beta-amylase are the two primary enzymes you are managing. Beta-amylase works best at lower temperatures, typically between 60°C and 65°C (140°F–149°F). It creates highly fermentable sugars, leading to a beer that is dry and crisp. Alpha-amylase thrives at higher temperatures, around 68°C to 72°C (154°F–162°F), creating larger sugar molecules that yeast cannot eat. These “unfermentables” provide the body and mouthfeel in your beer.
Most beginners aim for a “single infusion mash” at a compromise temperature of 66°C to 67°C (150°F–152°F). This provides a balance of both enzymes, resulting in a beer with moderate body and good alcohol content. You typically let the grain soak at this temperature for 60 minutes, ensuring the starch is fully converted. You can verify this with an iodine test; if a drop of iodine remains red on a sample of the liquid, the starch is gone. If it turns black, you need more time.
Striking the right temperature requires calculating your “strike water” heat. Grain is usually at room temperature, so when you add it to your hot water, the temperature will drop. Usually, your water needs to be about 5°C to 8°C (10°F–15°F) hotter than your target mash temperature to account for this cooling effect. Once mixed, the insulation of your mash tun should hold that heat steady for the hour.
Separating the Grain: Sparging and Lautering
Once the mash is complete, you have a pot full of sweet liquid and soggy grain. Lautering is the process of separating the two. The grain bed itself acts as a natural filter. By slowly draining the liquid from the bottom, the husks trap small particles, leaving you with a clear, golden wort.
Sparging is the act of rinsing the remaining sugars off the grain husks. Think of it like rinsing the last bit of soap out of a sponge. You want to extract every possible point of gravity without overdoing it. If you rinse too much or use water that is too hot (above 77°C or 170°F), you risk pulling tannins from the husks, which will make your beer taste like a dry, over-steeped tea bag.
Batch sparging is the simplest method for homebrewers. You drain the initial liquid completely, then add a fresh “batch” of hot water to the grain, stir it up, let it sit for ten minutes, and drain it again. It is fast and difficult to mess up. Fly sparging, or continuous sparging, involves slowly sprinkling hot water over the top while simultaneously draining from the bottom. This is more efficient but requires a careful balance to prevent the grain bed from compacting and “sticking.”
Benefits of the All-Grain Approach
Control is the primary benefit. You are no longer at the mercy of whatever malt extract was on the shelf. You can use heirloom malts, smoked grains, or raw adjuncts like oats and flaked rye to create textures that are impossible to achieve with extracts. This is where you develop a “signature” house style.
Cost savings are a significant long-term advantage. Raw grain is significantly cheaper than processed malt extract. A 25kg (55lb) sack of base malt can cost the same as a few small cans of extract but will produce three to four times the amount of beer. While the initial equipment investment is higher, the “price per pint” drops drastically once you have your system dialed in.
Soul and satisfaction cannot be measured in dollars or gravity points. There is a deep, ancestral satisfaction in smelling the toasted grain as it mashes and knowing that every drop of the final product was earned through your labor. You are not just a consumer; you are a practitioner of a 10,000-year-old craft.
Challenges and Common Mistakes
Temperature swings are the most common enemy. If your mash tun is poorly insulated, the temperature may drop over the hour, leading to an under-converted, starchy mess. Conversely, adding water that is too hot can “scald” the enzymes, ending the conversion process prematurely. Always pre-heat your mash tun with a gallon of hot water before you start to ensure the walls aren’t sucking the heat out of your strike.
Milling the grain incorrectly is another frequent pitfall. The husks need to be crushed just enough to expose the white, starchy interior, but not so much that they turn into flour. If the crush is too fine, the water cannot flow through the grain bed, leading to a “stuck sparge” where no liquid comes out of the valve. If the crush is too coarse, the water won’t reach the starch, and your efficiency will plummet.
Water chemistry is often overlooked by beginners. Beer is over 90% water, and the minerals in your tap water can drastically affect the enzymes’ performance. If your water is too alkaline, the mash pH will be too high, leading to poor sugar extraction and harsh flavors. Starting with distilled water and adding specific brewing salts like Gypsum or Calcium Chloride can solve this, but for your first few batches, just using filtered tap water is usually sufficient.
Limitations and Realistic Constraints
Time is the most immediate hurdle. An extract brew day can be finished in two hours. An all-grain brew day rarely takes less than five. You must account for heating large volumes of water, the hour-long mash, the slow rinsing process, and the long boil required to drive off certain compounds. This is a slow-motion hobby that requires patience and a clear schedule.
Physical space and labor are also factors. Lifting 5kg to 8kg (11lb–18lb) of wet grain is a workout. You will also be dealing with much more waste. Spent grain is heavy and wet; you need a plan for disposal, whether that is composting, feeding it to local livestock, or finding a very large trash bin. Do not underestimate the “mess factor” of handling raw agricultural products in a kitchen.
Equipment complexity can lead to more points of failure. Every hose, valve, and pump is a potential leak or a place for bacteria to hide. While the process is rewarding, it requires a higher level of maintenance and more rigorous cleaning protocols than simpler methods. If you prefer a “set it and forget it” approach, the manual labor of all-grain might feel like a chore.
All-Grain vs. Extract: A Comparison
| Feature | Extract Brewing | All-Grain Brewing |
|---|---|---|
| Total Brew Time | 2–3 Hours | 5–7 Hours |
| Ingredient Cost | Higher (Processed) | Lower (Raw Grains) |
| Equipment Cost | Low ($50–$100) | Moderate to High ($150–$1,000+) |
| Recipe Control | Limited to “Steeping” | Total (Grain Bill & Mash Temp) |
| Complexity | Beginner-Friendly | Intermediate / Advanced |
| Required Space | Minimal (Stovetop) | Significant (Garage/Large Kitchen) |
Practical Tips and Best Practices
Record everything in a brew log. Note your strike water temperature, your actual mash temperature at the 1-minute mark and the 60-minute mark, and your pre-boil gravity. Without data, you cannot fix what goes wrong or replicate what goes right. Serious practitioners treat their brew day like a laboratory experiment with the heart of a chef.
Keep your cleaning game strong. All-grain wort is incredibly sticky and full of nutrients that bacteria love. Any sugar left in a valve or a hose will mold quickly. Use an oxygen-based cleaner like PBW (Powdered Brewery Wash) and a no-rinse sanitizer like Star San. Remember: you spend 20% of your time brewing and 80% of your time cleaning.
Manage your “Mash Thickness.” A common ratio is 3 liters of water for every 1 kilogram of grain (about 1.5 quarts per pound). If the mash is too thick, the enzymes have a hard time moving around and converting starch. If it is too thin, you might dilute the enzymes too much. Stick to the standard ratio until you have a reason to change it.
- Always mill your grain fresh if possible; pre-milled grain loses its potency over time.
- Use a “Vorlauf” step: drain the first few liters of wort into a pitcher and gently pour it back over the grain bed to filter out small bits of husk.
- Insulate your kettle or mash tun with a heavy sleeping bag or reflectix wrap to hold temperatures steady.
- Add rice hulls to your mash if you are using high amounts of wheat or rye; they provide structure and prevent “stuck” mashes.
Advanced Considerations
Once you master the single infusion, look into “Step Mashing.” This involves raising the temperature of the mash through different “rests.” A protein rest at 50°C (122°F) can help with head retention and clarity in beers with lots of unmalted grain. A mash-out at 75°C (167°F) at the end of the hour stops all enzymatic activity and makes the wort less viscous, which helps with the rinsing process.
Water chemistry is the final frontier. Professional brewers adjust their water to mimic the famous brewing regions of the world. Adding Calcium Sulfate (Gypsum) can make your hops “pop” and give them a crisp bitterness, while Calcium Chloride can enhance the malty, silky mouthfeel of a stout. Invest in a pH meter to ensure your mash stays between 5.2 and 5.4, which is the “Goldilocks zone” for enzyme health.
Decoction mashing is an old-world technique where you boil a portion of the thick grain mash and add it back to the main pot to raise the temperature. This creates deep, melanoidin-rich flavors that are characteristic of traditional German lagers. It is labor-intensive and messy, but it provides a depth of flavor that no chemical addition can replicate.
Example Scenario: The Maiden Voyage SMaSH Ale
To understand the process, let’s look at a “SMaSH” (Single Malt and Single Hop) recipe. This is the best way to learn the flavor profile of your ingredients. We will aim for a 19-liter (5-gallon) batch of a simple Pale Ale.
Start with 5kg (11lbs) of Maris Otter Pale Malt. Heat 15 liters (4 gallons) of strike water to 72°C (162°F). When you mix the grain in, the temperature should settle right at 67°C (152°F). Cover the pot and wait for 60 minutes. While you wait, heat another 15 liters of sparge water to 75°C (167°F).
After the hour, drain the liquid into your boil kettle. Rinse the grain with your hot sparge water until you have about 26 liters (7 gallons) of wort. Bring this to a rolling boil for 60 minutes. Add 28g (1oz) of Cascade hops at the start of the boil for bitterness, and another 28g (1oz) with 10 minutes left for aroma.
Cool the wort quickly using an immersion chiller or an ice bath until it reaches 20°C (68°F). Pour it into your fermenter, pitch a packet of clean American Ale yeast, and wait two weeks. You have just produced a professional-grade beer from raw agricultural products. The gravity should be around 1.050, and the satisfaction will be 100%.
Final Thoughts
All-grain brewing is more than just a technique; it is a declaration of independence. By moving away from the “factory leftovers” of malt extract, you are reclaiming the soul of your beer. You are choosing the harder path because it is the only path that leads to true mastery. Every variable is now in your hands, from the enzymatic breakdown of the starch to the final mineral balance of the water.
Do not be discouraged by the complexity or the longer brew days. The skills you build here—patience, precision, and a deep understanding of raw materials—will serve you in every other aspect of self-reliant living. Start simple, keep your equipment clean, and trust the ancient biological processes that have been making beer for millennia.
As you grow more comfortable, you will find that the “rules” of brewing are actually just suggestions. You can push temperatures, blend unusual grains, and create beers that no commercial brewery would ever risk making. This is your craft. Treat it with the respect it deserves, and the grain will reward you with the best pint you have ever tasted.