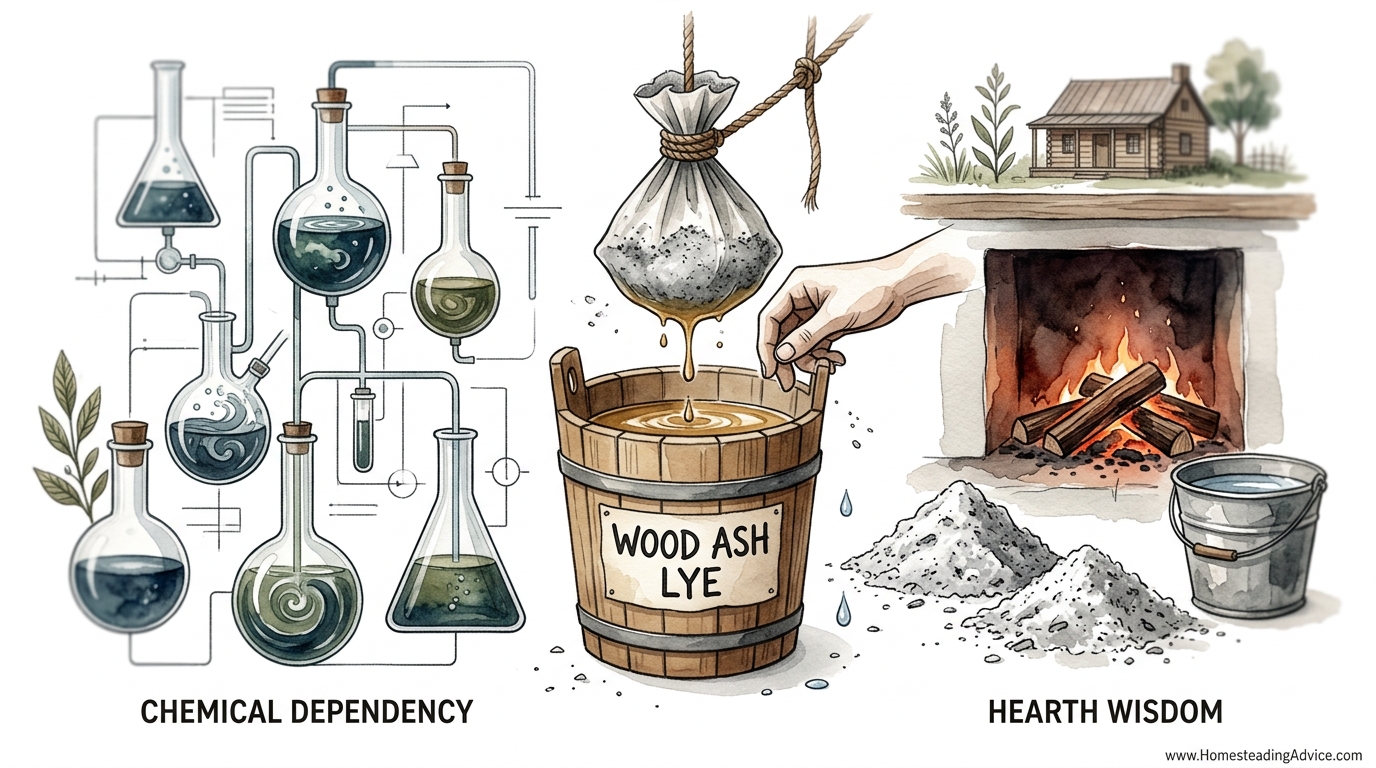
We traded a free, sustainable resource from our own fireplaces for a hazardous chemical that requires a global supply chain. Most modern soap makers are one shipping delay away from being unable to wash their hands. Our ancestors didn’t need a chemical plant; they just needed their winter firewood and a rain barrel. Learning to leach your own lye isn’t just a craft – it’s an insurance policy for your home apothecary.
This shift from hearth wisdom to chemical dependency happened so slowly we barely noticed it. We replaced the rhythmic drip of a leaching barrel with plastic bottles of sodium hydroxide beads. While commercial lye offers precision, it robs the modern homesteader of the fundamental cycle of the home. When you understand how to turn a pile of cold ash into a powerful cleansing agent, you reclaim a piece of sovereign knowledge that has sustained humanity for millennia.
The process is remarkably simple in theory but requires a patient eye and a respect for the chemistry involved. You are essentially mining minerals from the skeletal remains of trees. Every hardwood log you burn in your stove is a concentrated bank of potassium carbonate. By moving water through these ashes, you dissolve those minerals into a liquid known as potash or black-run lye.
In this guide, we will walk through the construction of a traditional leaching system, the science of wood selection, and the practical tests used to ensure your lye is strong enough to turn fat into soap. This is not just about making a cleaning product; it is about closing the loop on your household waste and mastering the art of the old ways.
How To Make Soap Lye From Wood Ash
Wood ash lye is a liquid alkali solution traditionally used to perform saponification, the chemical reaction that transforms fats and oils into soap. While modern soap makers typically use factory-produced sodium hydroxide (NaOH) or potassium hydroxide (KOH) in pellet form, wood ash lye is a natural “potash” solution primarily composed of potassium carbonate. It exists as a liquid and must be concentrated to the correct strength before it can effectively break down fat molecules.
In the real world, this method was the standard for centuries in rural homesteads and frontier settlements. It allowed families to produce their own cleaning agents using nothing but the byproduct of their heating fuel and the rendered fat from their livestock. Today, it remains a vital skill for those pursuing total self-sufficiency or for crafters who want to produce truly authentic, historical soaps.
Visualizing the process is helpful: think of a leaching barrel like a giant coffee percolator. Instead of coffee grounds, you have white wood ash. Instead of a paper filter, you use layers of straw and gravel. The water that drips out the bottom isn’t a morning beverage, however; it is a caustic liquid capable of dissolving organic matter, which is exactly why it works so well for making soap.
The Step-by-Step Leaching Process
Creating high-quality lye is a slow-motion endeavor. You cannot rush the minerals out of the wood. The goal is to maximize the contact time between the water and the ash while ensuring the resulting liquid is filtered as cleanly as possible.
1. Selecting and Preparing Your Ashes
The foundation of good lye is the ash itself. You must use only hardwood ashes, such as oak, hickory, maple, or ash. Softwoods like pine or cedar contain high amounts of resin and sap, which will contaminate your lye and prevent it from making usable soap.
Ensure your fire burned hot and clean. You want fine, white or grey ash. Avoid using ashes that contain bits of unburnt plastic, treated wood, or heavy amounts of charcoal. Sift your ashes through a fine screen or a flour sifter to remove any large “clinkers” or unburnt wood chunks. This ensures the water can move evenly through the barrel without finding channels of least resistance.
2. Constructing the Leaching Barrel
A traditional leaching system can be made using a food-grade plastic bucket, a wooden barrel, or a specialized V-shaped wooden hopper. For a standard home setup, a 5-gallon (19-liter) bucket is an excellent starting point.
Drill several small holes in the bottom of the bucket—about five holes of 1/8-inch (3-mm) diameter. Place this bucket on a stand or a set of blocks so you can fit a collection vessel underneath it. Use a glass or stainless steel container for collection; never use aluminum, as lye will rapidly corrode it and release dangerous hydrogen gas.
3. Layering the Filter Media
To prevent the ash from clogging the holes or washing into your finished lye, you need a layered filter at the bottom of the bucket. Start with 2 inches (5 cm) of clean pea gravel or smooth stones. This provides a drainage area where the liquid can collect before exiting the holes.
On top of the gravel, add 3 inches (7.5 cm) of clean, tightly packed straw or dried grass. This acts as the fine filter. Some modern makers use a piece of heavy burlap or an old cotton T-shirt, but straw is the traditional choice because it doesn’t clog as easily and allows for a steady drip.
4. Packing the Ash
Pour your sifted ashes into the bucket, leaving about 4 inches (10 cm) of space at the top. Pack the ashes down firmly but not so tightly that water cannot penetrate them. If the ash is too loose, the water will run through too quickly and won’t pick up enough minerals.
5. Adding the Water
Rainwater is the gold standard for lye making because it is “soft,” meaning it lacks the minerals found in tap water that can interfere with the chemical reaction. If you must use tap water, let it sit for 24 hours to allow any chlorine to evaporate.
Pour the water slowly over the top of the ashes. You want the ashes to be fully saturated. Once the water starts to disappear into the ash, continue adding it until you have a few inches of standing water on top. Cover the bucket with a lid to keep out debris and prevent evaporation.
6. The Long Drip
It may take several hours, or even a full day, for the first drops of lye to appear in your collection vessel. This liquid should be a deep amber or tea color. This is your “first run” lye, and it will be the strongest. As you continue to add water to the top of the barrel, the resulting liquid will become lighter and weaker. Most makers stop collecting once the liquid becomes pale yellow.
How to Test the Strength of Your Lye
Since wood ash lye is a natural product, its strength varies based on the type of wood burned and the temperature of the fire. You cannot rely on a standard recipe; you must test the concentration of the liquid you have produced.
The most famous historical method is the **Egg Test**. Place a fresh, room-temperature egg (still in its shell) into the cold lye liquid. If the egg sinks, the lye is too weak. If the egg floats so high that it lies on its side on the surface, it is too strong and will result in “harsh” soap. The goal is for the egg to float so that an area the size of a quarter (about 24 mm) is visible above the surface.
If an egg isn’t available, a small potato can serve the same purpose. A well-concentrated lye will support the potato so that only about half of it is submerged. Another old-world trick involves a chicken feather; if the lye is strong enough, it should begin to dissolve the fine barbs of the feather within a few minutes.
The Benefits of Traditional Wood Ash Lye
Choosing to make your own lye offers several practical advantages that go beyond mere nostalgia. It transforms a waste product into a valuable resource, creating a closed-loop system for the homestead.
* Supply Chain Independence: You are no longer reliant on industrial chemical suppliers. As long as you have firewood and water, you have the means to stay clean and maintain hygiene.
* Cost Efficiency: The raw materials are essentially free. While commercial lye is relatively inexpensive, the cost of shipping hazardous materials can be significant.
* Gentler Products: Potassium-based soaps made from wood ash are naturally softer and often gentler on the skin than the hard bars made from sodium hydroxide. They are excellent for liquid hand soaps, shampoos, and delicate laundry.
* Environmental Stewardship: You are avoiding the industrial footprint of chemical manufacturing and the plastic waste of commercial packaging.
Challenges and Common Mistakes
The primary challenge of making wood ash lye is its inherent unpredictability. Unlike a measured cup of lye beads, wood ash lye requires the maker to develop a “feel” for the material.
One common mistake is using **softwood ashes**. Woods like pine, fir, or spruce contain resins that don’t just weaken the lye—they actively interfere with the soap-making process, often resulting in a greasy, separated mess that will never “trace” or turn into soap.
Another error is **rushing the leaching**. If you pour water through the ash too quickly, or if you don’t pack the ash sufficiently, the water won’t stay in contact with the potassium carbonate long enough. This results in “weak water” that requires hours of boiling to concentrate, wasting time and fuel.
Finally, many beginners neglect **proper storage**. Wood ash lye reacts with the carbon dioxide in the air, which slowly turns the potent potassium hydroxide into weaker potassium carbonate. Always store your finished lye in airtight glass or high-density polyethylene (HDPE) containers.
Limitations of the Method
While wood ash lye is a powerful tool, it is important to understand what it *cannot* do. The chemistry of potassium is fundamentally different from the chemistry of sodium.
The most significant limitation is that **wood ash lye will not make hard bar soap**. Because it is a potassium-based alkali, the resulting soap will naturally be a soft paste or a liquid. Historically, pioneers would “salt out” the soap by adding large amounts of common salt (sodium chloride) at the end of the boiling process. This chemical exchange replaced the potassium with sodium, allowing the soap to harden into bars. However, this is an advanced technique that requires significant practice to master.
Additionally, wood ash lye is **less concentrated** than commercial alternatives. You will need to use a much larger volume of liquid lye to saponify a given amount of fat. This means soap making with wood ash lye almost always involves a “hot process” method, where the mixture is boiled for hours to evaporate excess water.
Comparing Traditional Lye to Commercial Alternatives
Understanding the differences between these two worlds helps you decide which is right for your current project.
| Feature | Wood Ash Lye (Potash) | Commercial Lye (NaOH/KOH) |
|---|---|---|
| Source | Hardwood fire byproduct | Industrial electrolysis of brine |
| Physical Form | Amber-colored liquid | Solid white beads or flakes |
| Soap Consistency | Soft paste or liquid | Hard bars or liquid (depending on type) |
| Precision | Low (requires testing) | High (measured by weight) |
| Skill Level | Intermediate to Advanced | Beginner Friendly |
Practical Tips and Best Practices
If you are ready to set up your first leaching barrel, keep these practical tips in mind to ensure a successful run.
* Use the “Snow” Method: In colder climates, some practitioners find that adding clean snow to the ash barrel and letting it melt slowly provides the perfect, gradual drip for high-concentration lye.
* Boil for Strength: If your lye fails the egg test after the first run, don’t throw it out. Pour the liquid into a stainless steel pot and boil it down. As the water evaporates, the concentration of the alkali increases. Test it periodically until the egg floats correctly.
* Neutralize with Vinegar: Always keep a bottle of white vinegar nearby. Lye is a strong base; vinegar is an acid. If you splash lye on your skin, the vinegar will neutralize the chemical reaction and stop the burn.
* The “Pearl Ash” Upgrade: For advanced users, you can take wood ash lye and evaporate it completely to create “black salts.” If you then bake these salts in a very hot fire, they turn white and become “pearl ash” (potassium carbonate), which is much purer and can even be used in traditional baking as a leavening agent.
Advanced Considerations: The Chemistry of Saponification
For the serious practitioner, understanding the math behind the barrel is useful. When you combine your wood ash lye with fat (such as rendered lard or tallow), you are performing a hydrolysis of triglycerides. The alkali breaks the bond between the glycerin and the fatty acids.
Because wood ash lye is predominantly potassium-based, the resulting soap molecules have a larger atomic radius than sodium-based soap. This is why potassium soaps remain liquid or soft; the molecules cannot pack together tightly into a crystalline lattice. If you find your soap is too “slimy,” it likely has too much free glycerin. Historically, this was solved by the long “boil-off,” where the soap was cooked for many hours until it reached a thick, taffy-like consistency.
Example Scenario: A Traditional Soap Day
Imagine it is early spring. You have spent the winter collecting the white ash from your oak-fed woodstove. You have about 10 gallons (38 liters) of sifted ash ready.
You set up your leaching bucket on the porch and add 2 gallons (7.5 liters) of collected rainwater. Over the next 48 hours, you collect roughly 1 gallon (3.8 liters) of deep brown, potent lye. You perform the egg test, and it floats perfectly with a quarter-sized patch showing.
In a large iron cauldron over an outdoor fire, you melt 5 pounds (2.25 kg) of rendered beef tallow. You slowly add your lye, stirring constantly with a long wooden paddle. For the next four hours, you maintain a steady simmer. The mixture shifts from a cloudy milk to a thick, translucent jelly. You have successfully closed the cycle, turning last year’s wood and last season’s livestock into a year’s supply of soap for your family.
Final Thoughts
Making soap lye from wood ash is a foundational skill for anyone interested in true self-reliance. It forces us to slow down and work with the rhythms of nature rather than against them. While it lacks the instant gratification of store-bought chemicals, it offers a deep sense of satisfaction that comes from mastering a process that once sustained every household on the planet.
As you experiment with different woods and leaching techniques, you will develop a refined understanding of the materials around you. You will begin to see your firewood not just as heat, but as a source of chemistry and cleanliness. This knowledge is an insurance policy, ensuring that no matter what happens to the global supply chain, you can always keep your home and your family clean.
We encourage you to start small. A single 5-gallon (19-liter) bucket is enough to teach you the fundamentals. Once you see that egg float for the first time, the transition from consumer to producer is complete. You are no longer just making soap; you are practicing a form of hearth wisdom that is as old as the fire itself.