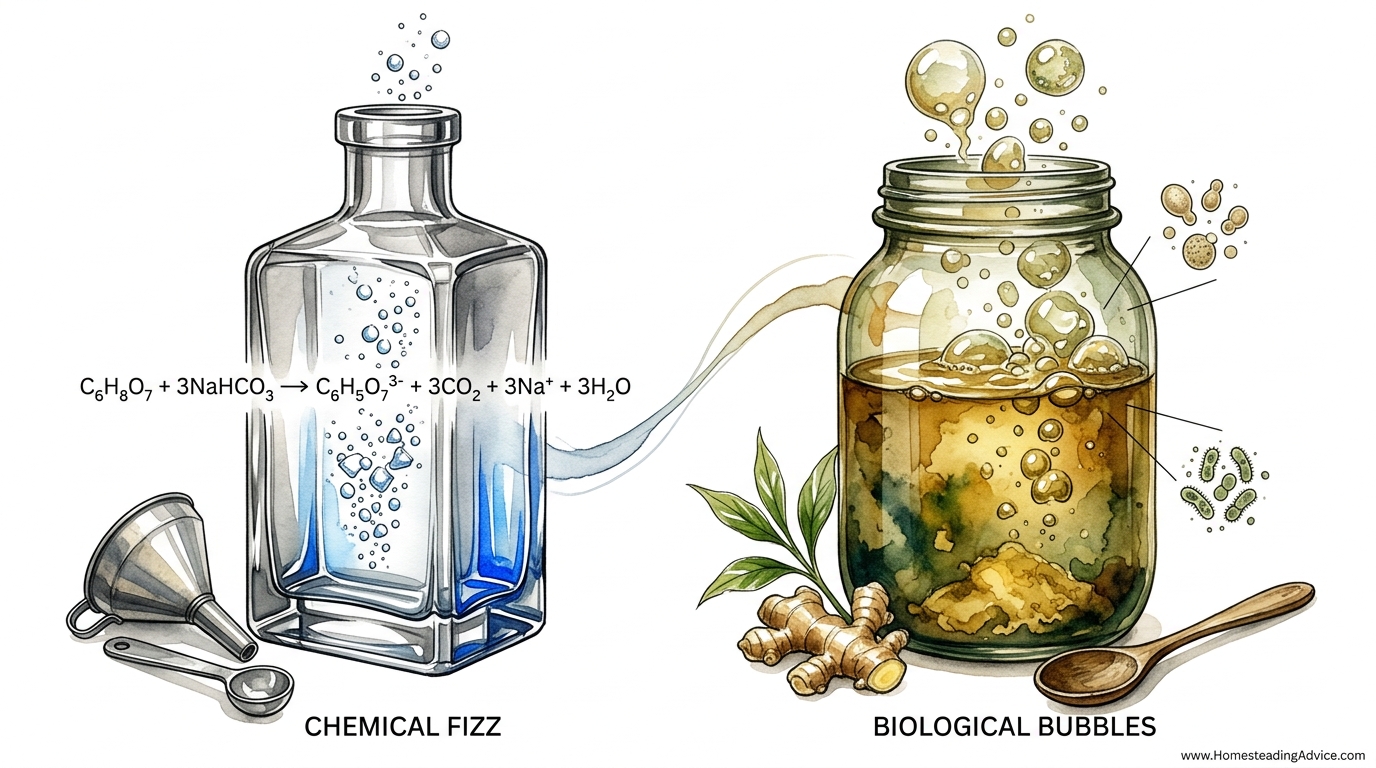
Commercial soda is a dead liquid sparked by a tank; wild soda is a living tonic sparked by the air around you. Why drink a chemical cocktail when your kitchen is already teeming with wild, beneficial yeasts? Capturing the biology on the skin of a ginger root allows you to create a ‘bug’ that carbonates any fruit juice into a sparkling, probiotic beverage. It’s not just a drink; it’s a living ecosystem in a bottle.
How To Make A Wild Ginger Bug For Soda
A ginger bug is a wild-fermented starter culture used to create naturally carbonated beverages. Unlike commercial sodas that rely on forced carbonation—injecting pressurized carbon dioxide into a liquid—a ginger bug uses the power of biology. It is a symbiotic colony of wild yeasts and lactic acid bacteria that naturally reside on the skin of fresh ginger roots and in the air of your home.
When you mix ginger, sugar, and water, you are creating a nursery for these microorganisms. Over several days, they consume the sugar and multiply, creating a concentrated “bug” full of life. This starter is then added to a sweetened liquid, such as fruit juice or herbal tea, where the microbes continue to eat the sugars. Because this process happens inside a sealed bottle, the resulting carbon dioxide cannot escape, dissolving back into the liquid to create those sought-after bubbles.
In the real world, this is the ancestral precursor to modern ginger ale and ginger beer. Before the industrialization of the soft drink industry, families across the Caribbean and Europe maintained these starters to produce “small beers” and medicinal tonics. Using a ginger bug today is a way to reclaim that self-reliance, moving away from high-fructose corn syrup and toward a living, gut-healthy alternative.
The Biological Engine: How Fermentation Works
Understanding the science of your bug helps you troubleshoot when things go quiet. The primary workers in your jar are wild yeasts, often from the Saccharomyces family, and lactic acid bacteria (LAB) such as Lactobacillus. These microbes are anaerobic, meaning they can function without oxygen, though they benefit from a bit of air during the initial “capture” phase.
The process follows a predictable path: the yeast consumes sucrose (sugar) and converts it into ethanol and carbon dioxide (CO2). Simultaneously, the lactic acid bacteria convert sugars into lactic acid, which gives the soda a slight, refreshing tang and acts as a natural preservative by lowering the pH of the liquid. This acidic environment prevents harmful pathogens from taking hold.
While commercial soda is a static product, your wild soda is dynamic. The carbonation levels, flavor profile, and probiotic density will change based on the temperature of your kitchen and the specific wild strains local to your area. This is why a ginger bug made in a humid coastal town may behave differently than one made in a dry mountain cabin.
The Starter Kit: Ingredients and Tools
Success with a wild ferment starts with the quality of your raw materials. You do not need expensive laboratory equipment, but you do need to understand how certain ingredients can help or hinder microbial growth.
The Ginger
Always use organic ginger whenever possible. Conventional ginger is frequently irradiated to extend shelf life, a process that kills the very wild yeasts you are trying to capture. If you must use conventional ginger, do not peel it, as the highest concentration of microbes sits on the skin. Look for roots that are firm, plump, and have a smooth, shiny skin. Avoid ginger that feels soft, shriveled, or shows signs of blue-green mold.
The Water
Chlorine is the enemy of fermentation. Most municipal tap water is treated with chlorine or chloramines to kill bacteria, which can stall your ginger bug before it starts. Use filtered water, spring water, or tap water that has been boiled and allowed to cool. If your city uses simple chlorine, you can leave a pitcher of water out overnight to let the gas dissipate, but chloramines are more persistent and usually require filtration.
The Sugar
White granulated sugar is the easiest for yeast to process, but raw cane sugar or turbinado sugar adds minerals that can make a “bug” more vigorous over the long term. Avoid using honey or maple syrup for the initial starter phase, as they have their own antimicrobial properties or different sugar structures that can lead to unpredictable results for beginners.
Equipment List
- A Glass Jar: A wide-mouth pint (500 ml) or quart (1 liter) Mason jar works best.
- Breathable Cover: A coffee filter, cheesecloth, or a clean scrap of linen.
- Rubber Band: To secure the cover against fruit flies.
- Wooden or Plastic Spoon: Metal can sometimes react with the acidity, though a quick stir with stainless steel is generally fine.
Step-by-Step: Cultivating Your Ginger Bug
The goal of this process is to build a massive population of yeast and bacteria. You do this through “feeding” the culture daily, similar to how one maintains a sourdough starter.
Day 1: The Initialization
Mix 1 cup (240 ml) of chlorine-free water with 1 tablespoon (approx. 15 grams) of finely minced or grated ginger and 1 tablespoon (approx. 12 grams) of sugar in your jar. Stir vigorously. This aeration introduces oxygen, which helps the yeast multiply rapidly before they switch to the anaerobic phase of producing bubbles. Cover the jar and set it in a warm spot out of direct sunlight, ideally between 21°C and 27°C (70°F to 80°F).
Days 2 through 5: The Feeding Schedule
Every 24 hours, add another 1 tablespoon of minced ginger and 1 tablespoon of sugar. Stir well until the sugar is dissolved. By Day 3, you should see small bubbles forming around the edges of the jar. By Day 5, the liquid should look slightly cloudy, and you may hear a faint fizzing sound when you stir it. The ginger pieces might begin to float and dance as they are lifted by CO2.
The Readiness Test
Your bug is ready to use when it is consistently bubbly and has a pleasant, yeasty, and slightly spicy aroma. If the weather is cold, this might take up to 7 or 8 days. If it’s a hot summer, your bug might be aggressive and ready in 3 days. Once it reaches this “active” state, you can either use it immediately to make soda or move it to the refrigerator for long-term storage.
Turning Your Bug into Soda: The Second Ferment
Once you have a healthy starter, the real fun begins. You can turn almost any sweetened liquid into soda. Common bases include hibiscus tea, apple juice, lemonade, or a traditional ginger tea for making ginger beer.
The Ratio
A standard starting ratio is 1/4 cup (60 ml) of strained ginger bug liquid for every 1 quart (approx. 1 liter) of base liquid. If your base liquid is not naturally sweet (like a herbal tea), you must add sugar. A good rule of thumb is 1/2 cup (100 grams) of sugar per quart of tea. The yeast will consume most of this sugar to create the bubbles, so the final drink will be significantly less sweet than when you started.
Bottling and Carbonation
Pour your mixture into pressure-rated bottles. Plastic PET bottles (recycled soda bottles) are the safest for beginners because you can feel the bottle become hard as pressure builds. If using glass, only use “Grolsch-style” swing-top bottles designed for carbonation. Do not use decorative bottles or jars, as they can explode under the internal pressure.
Leave about 1 to 2 inches (2.5 to 5 cm) of “headspace” at the top of the bottle. Seal the bottles and let them sit at room temperature for 24 to 48 hours. Check the pressure by squeezing the plastic bottle or carefully “burping” one glass bottle. As soon as the desired fizz is reached, move all bottles to the refrigerator. Cold temperatures slow the yeast down, preventing the bottles from over-pressurizing.
Benefits of Wild Fermented Soda
Choosing biological bubbles over chemical fizz offers more than just a better flavor profile; it integrates nutrition back into your refreshment.
- Probiotic Content: Homemade soda is a raw, living product. It contains diverse strains of beneficial bacteria that support gut health and a robust immune system.
- Reduced Sugar: Because the yeast eats the sugar to create carbonation, the sugar content of the final beverage is naturally lower than commercial alternatives.
- Digestive Enzymes: Ginger itself is well-known for aiding digestion and reducing nausea. The fermentation process makes these compounds even more bioavailable.
- Chemical-Free: You avoid the artificial dyes, phosphoric acid, and “natural flavors” that characterize the industrial soda industry.
Challenges and Common Mistakes
Fermentation is a partnership with nature, and nature can be fickle. Most failures come from a few common oversights.
The “Dead” Bug
If after five days you see no bubbles, your ginger may have been irradiated, or your water contained too much chlorine. Another culprit is temperature; if your kitchen is below 18°C (64°F), the yeast will move very slowly. Try moving the jar to the top of the refrigerator where it’s warmer.
Slimy or Syrupy Texture
Occasionally, a ginger bug will turn thick and “ropey,” almost like a thin syrup. This is usually caused by a temporary overgrowth of certain bacteria (Pediococcus). It is not harmful, and usually, if you keep feeding it daily, the yeast will eventually regain dominance and the texture will return to a watery consistency.
The Ginger Bug Bomb
This is the most serious mistake. If you forget your bottles on the counter for too long, or if you use too much sugar, the pressure can exceed the strength of the glass. Always refrigerate your soda once it is carbonated. If you are worried about a bottle, place it in a cardboard box or a plastic bin while it ferments on the counter to contain any potential mess.
Limitations and When This May Not Work
While the ginger bug is versatile, it has its boundaries. It is not a “fix-all” for every liquid.
Environment plays a massive role. In extremely humid or mold-prone houses, wild ferments can sometimes catch unwanted spores from the air. If you see fuzzy black, green, or orange mold on the surface of your bug, you must throw it out and start over.
Additionally, very high-alcohol beverages cannot be made easily with a ginger bug. Wild yeasts typically have a lower alcohol tolerance than commercial brewer’s yeast. Most ginger bug sodas will stay around 0.5% to 1% ABV (Alcohol by Volume). If you are looking to brew a hard 5% ginger beer, you will likely need to transition to a specific champagne yeast.
Comparing Fermentation Starters
Not all “bubbles” are created equal. Depending on your goals, you might choose a different starter culture.
| Feature | Ginger Bug | Kombucha (SCOBY) | Water Kefir |
|---|---|---|---|
| Primary Flavor | Spicy, ginger-forward | Tart, vinegary | Neutral, sweet |
| Difficulty | Easy (Wild capture) | Medium (Needs starter) | Easy (Needs grains) |
| Maintenance | Daily feeding | Batch every 7-14 days | Batch every 24-48 hours |
| Carbonation | Very Strong | Moderate | High |
Practical Tips for Best Results
Maintaining a bug can become a chore if you don’t find a rhythm. These adjustments make the process more efficient.
- The Fridge Nap: You do not have to feed your bug every day forever. Once it is active, put a lid on the jar and store it in the refrigerator. Feed it 1 tablespoon of ginger and sugar just once a week. When you want to bake or brew, bring it out 24 hours in advance to “wake it up” with a fresh feeding.
- Grate, Don’t Dice: Grating the ginger increases the surface area, releasing more juice and more microbes into the water. This typically leads to a more active and faster-fermenting bug.
- Sourcing Organic: If organic ginger is expensive, check local ethnic markets (especially Asian or Indian grocers). They often have fresher, high-quality ginger at lower prices.
- Use the “Tester” Method: When bottling in glass, always fill one small plastic soda bottle with the same batch. When that plastic bottle feels rock-hard, you know the glass bottles are also carbonated and ready for the fridge.
Advanced Considerations: Beyond Ginger
Once you master the ginger bug, you can apply these principles to other roots and fruits. A Turmeric Bug is made exactly like a ginger bug but uses fresh turmeric root, resulting in an earthy, bright orange starter with potent anti-inflammatory properties.
Consider the mineral content of your sugar. Adding a small piece of “jaggery” or a teaspoon of molasses to your bug can provide trace minerals that boost the resilience of the yeast colony. This is particularly useful if you live in an area with very soft water, which may lack the minerals needed for optimal microbial health.
For those interested in the historical aspect, you might explore the Ginger Beer Plant (GBP). While often confused with a ginger bug, the GBP is a specific SCOBY that looks like translucent grains. It is a more stable, heirloom culture that has been passed down for centuries. The ginger bug is its wild, spontaneous cousin—easier to start, but requiring more regular feeding.
Example Scenario: A Batch of Hibiscus “Zinger” Soda
To see how this works in practice, let’s look at a 2-liter batch of herbal soda.
First, brew a strong hibiscus tea by steeping 1/2 cup of dried hibiscus flowers in 2 liters of hot, filtered water. While the tea is still warm, stir in 1 cup (200 grams) of sugar until dissolved. Let the tea cool completely to room temperature. This is crucial; if the tea is hotter than 35°C (95°F), it will kill your bug.
Once cool, strain 1/2 cup (120 ml) of your active ginger bug into the tea. Stir well. Pour the mixture into four 500 ml swing-top bottles, leaving an inch of headspace. Place the bottles in a kitchen cupboard. After 24 hours, “burp” one bottle. If it lets out a sharp *pop*, they are ready. Move them to the fridge for 4 hours to chill before drinking. The result is a deep red, effervescent tonic with a spicy ginger finish.
Final Thoughts
Creating a wild ginger bug is more than a culinary project; it is a way to reconnect with the biological rhythms of the home. It turns a simple kitchen into a laboratory of life, where the air and the earth provide everything needed for a sparkling, healthful beverage. By moving away from industrial soda, you gain control over your ingredients and support your body with a living tonic.
Experimentation is the heart of wild fermentation. Do not be discouraged if your first bug is slow or if your first batch of soda is too sweet. Each jar is a learning experience, and as you get to know the wild yeasts in your home, your results will become more consistent and delicious.
Start small, keep your tools clean, and trust the process. Soon, the sound of a popping bottle cap will be a reminder of the invisible, beneficial ecosystem you’ve built on your own countertop. Encourage others to take a sip, and share the “bug” so the tradition of wild soda continues.