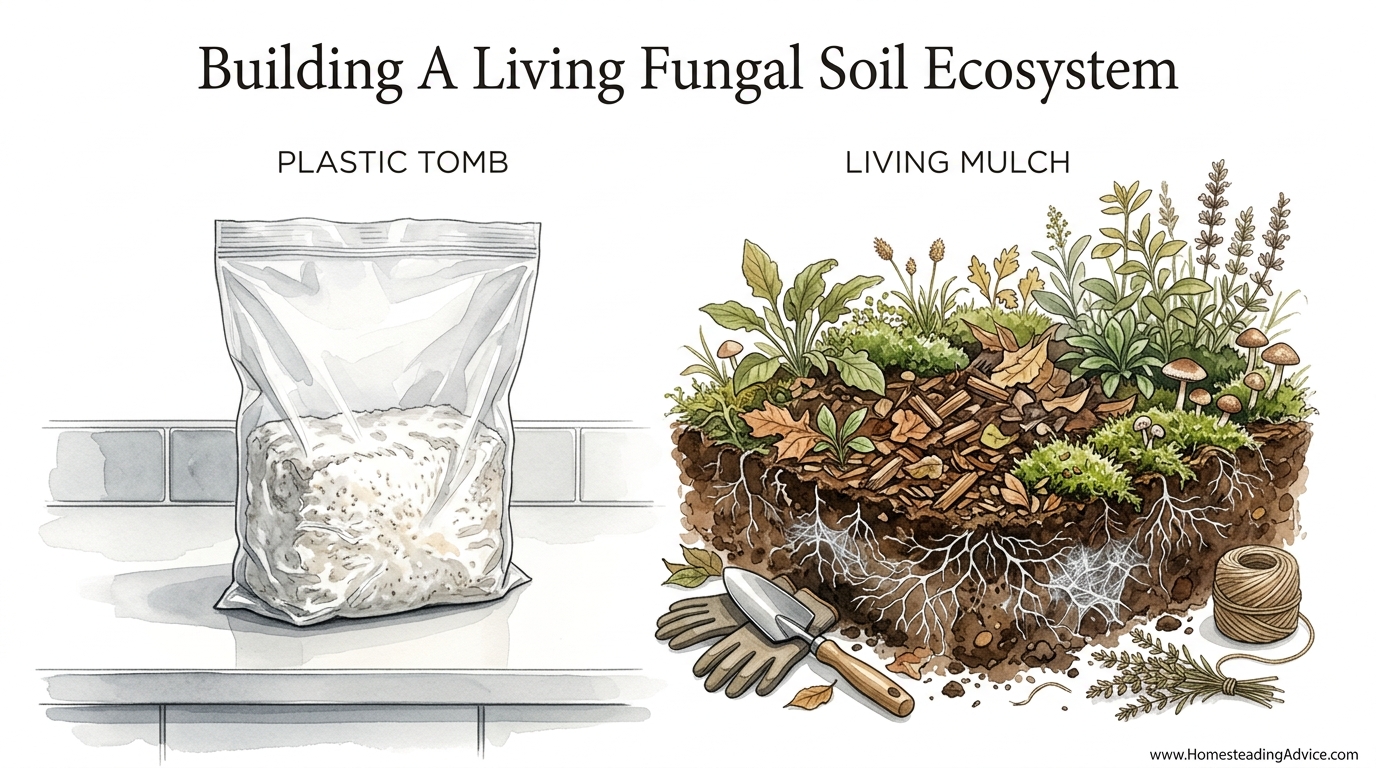
Why grow in a sterile plastic cage when you can build a living soil engine that feeds your garden and your family? Grow kits are great for beginners, but they are ‘dead’ systems – once the bag is spent, it’s trash. Living mulch systems integrate into your garden, building soil health, feeding your trees, and returning year after year with zero waste.
For generations, the old-timers knew that a healthy forest floor was the gold standard for fertility. They saw how the dark, crumbly earth beneath a rotting log produced the finest growth without a single drop of synthetic fertilizer. Today, we call this regenerative agriculture or permaculture, but it is really just an ancient understanding of the fungal kingdom. By inviting these silent workers into our garden beds, we move away from the “plastic tomb” of industrial grow bags and toward a self-sustaining cycle of life.
Building a living fungal soil ecosystem is about more than just harvesting a few gourmet mushrooms. It is about creating a biological infrastructure that manages water, cycles nutrients, and protects your plants from pests. This guide will walk you through the process of turning your garden mulch into a thriving mycelial web that grows stronger with every passing season.
Building A Living Fungal Soil Ecosystem
A living fungal soil ecosystem is a deliberate partnership between saprotrophic fungi and the organic matter in your garden. Unlike plants, which make their own food from sunlight, these fungi eat the tough, woody materials that most other life forms cannot digest. They are the primary recyclers of the planet, turning fallen branches and dead straw into rich, black humus. In a garden setting, this means your wood chip paths or straw-mulched beds become an active digestive system for the soil.
This ecosystem exists because fungi have evolved to seek out carbon-rich materials. When you provide a consistent source of wood chips or straw and introduce the right fungal species, you create a mycelial mat that can span hundreds of square feet (or tens of square meters). This mat acts like a subterranean internet, connecting different parts of your garden and facilitating the movement of moisture and minerals. It is a natural “engine” because it runs on the waste products of the garden and produces fertility as an exhaust.
In the real world, you see these systems at work on the forest floor. When a tree falls, it is immediately claimed by fungal pioneers. Over several years, these fungi soften the wood, making it accessible to bacteria, worms, and eventually the roots of new seedlings. By mimicking this process in your vegetable patches or under your fruit trees, you are essentially “fast-forwarding” the creation of topsoil. Instead of waiting decades for nature to build an inch of soil, a well-managed living mulch can build several inches of high-quality compost in just a few seasons.
How Fungi Transform Waste into Wealth
The magic of the fungal engine lies in its ability to break down lignin and cellulose. Lignin is the “glue” that holds trees together, and it is notoriously difficult to decompose. Most bacteria struggle with it, but fungi produce powerful enzymes that literally melt wood at the molecular level. As the fungi eat the carbon in the wood, they release locked-up nutrients like nitrogen, phosphorus, and potassium (N-P-K) in a form that plant roots can easily absorb.
This process is not just about decomposition; it is also about construction. As the fungal strands—called hyphae—grow through the soil, they weave together particles of sand, silt, and clay into larger “aggregates.” These aggregates create a crumbly soil structure that allows air and water to penetrate deep into the earth. Without these fungal “rebar” structures, soil often becomes compacted and lifeless, like a sun-baked brick.
Furthermore, the fungal engine provides a massive surface area for water retention. Mycelium is incredibly absorbent, acting like a giant sponge beneath the surface. During heavy rains, the fungal mat soaks up moisture and holds it, preventing erosion and runoff. In times of drought, the fungi can slowly release this water back to the soil, keeping your plants hydrated even when the sky is dry. This resilience is the hallmark of a living system compared to a sterile, plastic-dependent one.
Selecting the Right Mushroom Species
Not every mushroom is suited for the living mulch system. You need “primary decomposers” that are aggressive enough to hold their own against wild fungi but docile enough not to harm your living plants. The following species are the workhorses of the fungal garden:
- Wine Cap (Stropharia rugosoannulata): Often called the “Garden Giant,” this is the king of living mulches. It thrives in hardwood chips and straw, grows rapidly, and is incredibly easy to identify with its wine-red cap and thick, white stem.
- Oyster Mushrooms (Pleurotus ostreatus): These are voracious eaters of cellulose. While often grown on logs, they can be established in straw-mulched beds or wood chip piles, especially in cooler, shaded areas of the garden.
- Elm Oyster (Hypsizygus ulmarius): Not a true oyster, but a fantastic companion for brassicas and other leafy greens. It lives happily in the root zones of garden plants without causing any damage.
- Shaggy Mane (Coprinus comatus): A great choice for richer, compost-heavy soils. They often pop up naturally in disturbed ground and help break down denser organic matter.
Step-by-Step: Installing Your Mycelial Engine
Building your system is a straightforward process that follows the “lasagna” method of layering. The best time to start is in the early spring as the soil wakes up, or in the fall when the rains return. You will need mushroom spawn—which is essentially the “seed” of the fungus—usually provided in the form of sawdust or grain.
Step 1: Site Preparation. Choose a location that is partially shaded or a garden bed that will be covered by the canopy of your vegetable plants later in the season. Fungi love moisture and hate direct, baking sunlight. Clear the area of heavy weeds, but don’t worry about tilling the soil. You want the existing soil structure to remain intact.
Step 2: The Cardboard Base. Lay down a layer of plain, brown cardboard over the area. This serves two purposes: it smothers existing weeds and provides a “clean slate” for your chosen fungi to colonize. Soak the cardboard thoroughly with water until it is soft and pliable. Use about 2–3 layers if you are dealing with particularly stubborn grass.
Step 3: The First Layer of Substrate. Spread a 2-inch (5 cm) layer of fresh hardwood chips or clean straw over the cardboard. Hardwood chips from trees like oak, maple, or birch are ideal. Avoid cedar or redwood, as their natural oils can inhibit fungal growth. Ensure the material is moist but not dripping wet.
Step 4: Inoculation. Crumble your mushroom spawn over the substrate. If you are using Wine Cap sawdust spawn, a common rate is about 5 lbs (2.25 kg) of spawn for every 50 to 100 square feet (4.5 to 9 square meters). Try to distribute it evenly, ensuring that the “white fluff” of the mycelium is in direct contact with the wood or straw.
Step 5: The Top Layer. Cover the spawn with another 2–3 inches (5–7 cm) of substrate. This protects the delicate mycelium from the sun and wind. Give the entire bed a deep watering. In dry climates, you may want to add a light “capping” layer of straw or even a burlap sack to help maintain humidity during the first few weeks of colonization.
Benefits of a Living Fungal Mulch
The most immediate benefit is, of course, the harvest. A well-established Wine Cap bed can produce several flushes of gourmet mushrooms throughout the season. These are nutrient-dense foods that you can’t usually find at the grocery store because they don’t ship well. However, the true value lies beneath the surface in the long-term health of your land.
Fungal mulches are incredible at pest management. The Wine Cap mushroom, for example, produces specialized cells called acanthocytes that can snag and consume root-knot nematodes. These tiny worms are a plague to many vegetable gardeners, especially those growing tomatoes and carrots. By having a fungal engine in your soil, you have a 24/7 security team protecting your plant roots from these microscopic predators.
Another major advantage is the reduction in labor. Once the fungal engine is running, you no longer need to “turn” your compost or haul heavy bags of fertilizer. The fungi do the turning for you, moving nutrients vertically and horizontally through the soil profile. Over time, the bottom of your mulch layer will turn into a rich, black earth that you can pull back and plant directly into. This is “ancestral wisdom” updated for the modern age: letting the biology do the heavy lifting.
Challenges and Common Mistakes
The biggest enemy of a fungal system is dryness. Unlike plants, which can often wilt and then recover, once the fine “hairs” of the mycelium dry out completely, they often die back. Many beginners install their beds and then forget to water them during a summer heatwave. If the mulch feels dry more than an inch (2.5 cm) deep, it is time to get the hose out.
Using the wrong wood is another frequent error. Conifers like pine and spruce are full of resins and antimicrobial compounds that trees use to protect themselves from fungi while they are alive. These same compounds will slow down or stop your mushroom spawn from growing. Stick to “sweet” hardwoods or agricultural straw. If you must use pine, let the chips age outdoors for at least 6 months to a year so the resins can leach out before you inoculate them.
Identification is also a hurdle for some. While Wine Caps are very distinct, wild mushrooms will inevitably move into your mulch over time. Some of these might be harmless “LBMs” (Little Brown Mushrooms), but others could be toxic. Always double-check your harvest. A true Wine Cap has a distinct ring on the stem and produces a dark, purplish-black spore print. If you aren’t 100% sure, don’t eat it—let it stay in the garden and do its work in the soil instead.
Limitations and When This May Not Be Ideal
Fungal soil systems require a certain amount of “fuel” to keep running. If you live in a region where organic matter is extremely scarce or expensive, maintaining a thick mulch layer might be difficult. A “dead” system like a plastic grow bag is a closed loop, but a living engine is an open one; it needs periodic top-offs of wood chips or straw every year to keep the fungi fed and the moisture locked in.
Climate is also a factor. In extremely arid desert environments, the amount of water required to keep a fungal mulch alive might outweigh the benefits. Similarly, in very high-altitude regions with short growing seasons, the fungi may not have enough time to colonize and fruit before the ground freezes solid. That said, even in these areas, a fungal mulch can still work if it is integrated into a greenhouse or a heavily irrigated kitchen garden.
Lastly, consider the “Fungal to Bacterial” (F:B) ratio of your specific crops. Most annual vegetables (like lettuce and beans) prefer a soil that is balanced or slightly bacterial-dominant. If you create a massive, thick wood chip mulch, you might tip the scales too far toward a fungal-heavy forest soil, which can actually slow down the growth of some “weedier” annual crops. It is usually best to use fungal mulches in pathways, under perennial berries, or around fruit trees where a high F:B ratio is exactly what the plants desire.
Comparison: Plastic Bags vs. Living Soil Engines
| Feature | Sterile Grow Kit (Plastic Tomb) | Living Mulch (Soil Engine) |
|---|---|---|
| Waste Product | Single-use plastic bags and spent substrate. | Zero waste; creates permanent humus. |
| Maintenance | High (misting, humidity domes, sterile tools). | Low (mostly just watering and annual mulch). |
| Longevity | 2–3 weeks (one or two flushes). | Years (perennial system). |
| Soil Health | None (isolated from the earth). | Massive (builds structure and fertility). |
| Initial Skill | Low (open the box). | Moderate (understanding biology). |
Practical Tips for a Thriving System
If you want to speed up the colonization of your bed, try the “Slurry Method.” Take a handful of fresh, healthy mushroom stems (the parts you’d usually throw away) and pulse them in a blender with some non-chlorinated water. Pour this slurry into a watering can and sprinkle it over new wood chips. This is an excellent way to expand your patch for free using your own harvest.
Always source your wood chips from local arborists if possible. Large-scale municipal mulch is often “hot” or partially composted, which can be fine, but fresh chips have more of the sugars and hemicelluloses that primary decomposers love. When you see a tree service working in your neighborhood, ask them if they have a load of hardwood. Often, they are happy to dump it in your driveway for free, saving them a trip to the landfill.
Manage your “capping.” In the first few months, the mycelium is vulnerable to surface evaporation. A thin layer of straw—about 1 inch (2.5 cm)—on top of your wood chips acts as a buffer. It keeps the wind from whipping away the humidity right at the surface where the mushrooms will eventually pin and fruit. This small detail can be the difference between a massive harvest and a complete failure.
Advanced Considerations: Mycoremediation
Serious practitioners often look at fungal engines as more than just food producers; they are environmental filters. Fungi are capable of breaking down complex hydrocarbons, certain pesticides, and even herbicides like glyphosate. If you are taking over a piece of land that was previously treated with chemicals, a thick layer of inoculated mulch can act as a biological “liver” for the soil, processing these toxins before they reach your vegetable crops.
Furthermore, you can use these systems to manage runoff. By building “mycoswales”—depressions in the landscape filled with inoculated wood chips—you can filter rainwater that flows off of driveways or roofs. The mycelium acts as a physical and biological filter, trapping sediments and breaking down oils or heavy metals. This is a powerful tool for the homesteader looking to create a truly clean and resilient ecosystem.
Scaling these systems involves understanding the succession of life. After 2 or 3 years, a Wine Cap bed will have exhausted the easily available wood and turned it into rich compost. At this point, the Wine Caps will naturally move on. You can then “plant out” the compost into your vegetable beds and restart the cycle with fresh chips. Alternatively, you can introduce secondary decomposers like Agaricus species that prefer that aged, composted material, effectively stacking your harvests over time.
Example Scenario: The Orchard Engine
Imagine a small home orchard with five fruit trees. In a typical “sterile” setup, the ground beneath the trees is either bare soil or mowed grass, both of which compete with the trees for nutrients. By switching to a fungal engine, the grower clears a 6-foot (1.8-meter) circle around each tree and applies the lasagna method: wet cardboard, 4 inches (10 cm) of oak chips, and 1 lb (0.45 kg) of Wine Cap spawn per tree.
In the first year, the fungi colonize the chips, holding onto moisture and suppressing grass. The trees show increased vigor because the fungi are providing a constant “drip feed” of nutrients and the roots no longer have to fight through compacted soil. In the fall, after a heavy rain, the grower harvests 10 lbs (4.5 kg) of fresh mushrooms from the orchard floor.
By the third year, the wood chips have turned into 2 inches (5 cm) of dark, fungal-rich topsoil. The orchard has become a closed loop: the prunings from the fruit trees are chipped and fed back to the fungi, which in turn feed the trees. The “waste” of the orchard has become the very foundation of its fertility. This isn’t just theory; it is a practical, scalable way to manage land that has been proven by forest ecology for millions of years.
Final Thoughts
Building a living fungal soil ecosystem is a fundamental shift in how we relate to the earth. It moves us away from being consumers of “kits” and toward being stewards of a biological process. When we choose the living mulch over the plastic bag, we are making a commitment to long-term health, resilience, and the “old ways” of working with nature rather than against it.
The beauty of this system is its simplicity. You don’t need a lab, a pressure cooker, or a degree in biology. All you need is some cardboard, some wood, and the willingness to let the fungi do what they were born to do. It is a slow, steady, and incredibly rewarding way to garden that pays dividends in soil health and gourmet food for years to come.
Start small, perhaps with a single pathway or a shaded corner of your garden. Observe how the mycelium runs, how the soil changes, and how the life in your garden responds. Once you see the white web of life taking hold in your own backyard, you will never want to go back to a garden without its fungal engine.