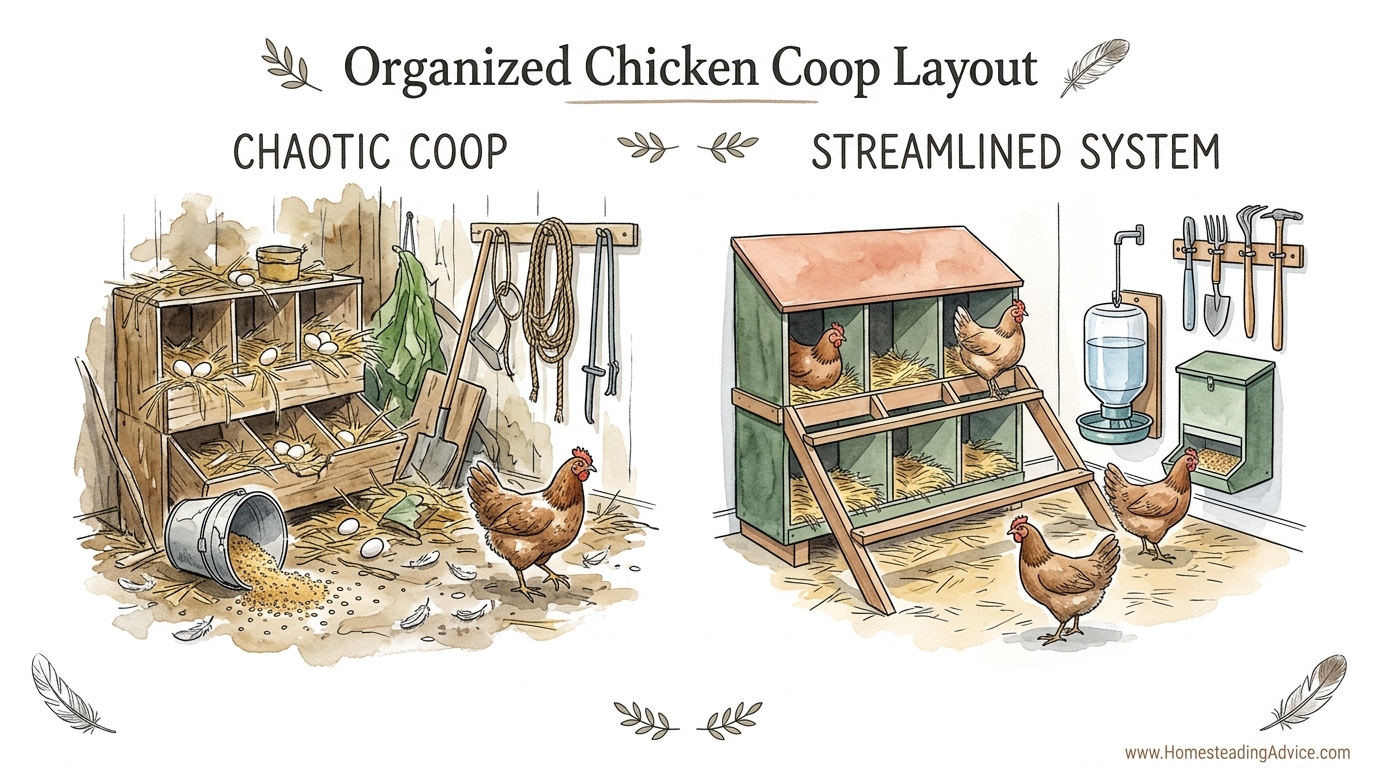
Chicken keeping should take 10 minutes a day, not an hour of struggling with a mess. If you find yourself dreading coop chores, it’s not the chickens – it’s the workflow. By organizing your tools and installing smart surfaces like droppings boards, you can turn a morning struggle into a streamlined 5-minute routine. Here is the blueprint for a high-efficiency coop.
A functional chicken coop is the heartbeat of a self-sufficient homestead. Far too often, new keepers focus on the aesthetic of the building rather than the efficiency of the chores performed inside it. When the layout is haphazard, manure accumulates in hard-to-reach corners, eggs get broken in dirty nests, and dust covers every surface. This friction leads to burnout, which is why transitioning from a chaotic coop to a streamlined system is essential for anyone serious about long-term poultry management.
Every minute saved in the morning is a minute earned for other homestead tasks. Efficiency comes from understanding the natural behavior of the birds and designing the space to catch waste before it hits the floor. Using historical wisdom combined with modern ergonomic principles, you can create a sanctuary that serves both the flock and the keeper. This guide explores the depths of coop organization, focusing on high-impact modifications that drastically reduce maintenance time.
Organized Chicken Coop Layout
An organized chicken coop layout is a deliberate spatial arrangement designed to minimize waste movement and maximize accessibility. Think of the coop as a small-scale processing plant. The “inputs” are feed and water, and the “outputs” are eggs and manure. When these elements are placed randomly, the keeper must walk unnecessary steps and fight through obstacles to manage the cycle. A streamlined layout groups these activities into zones.
The core philosophy of an efficient layout centers on the clean-to-dirty gradient. The entrance should lead into a “clean zone” where egg collection and feed storage occur. Further back, the “living zone” contains the roosting bars and droppings boards. This ensures you aren’t walking through manure to reach the nesting boxes. In real-world homesteading, this layout prevents the tracking of pathogens across the coop and into your own home.
Visualize a coop divided into thirds. The front third is for the keeper, with easy access to nesting boxes from the outside. The middle third is open floor space for movement and scratching. The back third is the roosting area, which is the primary source of manure. Elevating the roosts and placing droppings boards directly beneath them catches roughly 70% to 80% of all poultry waste in one localized, easy-to-clean spot. This single design choice transforms the entire maintenance schedule.
Zoning for Success
Effective zoning requires looking at the coop from the chickens’ perspective as well. Nesting boxes must be placed in the darkest, quietest corner to encourage laying, but they should be lower than the roosting bars to prevent birds from sleeping—and pooping—in them. Roosting bars should occupy the highest point in the coop to satisfy the birds’ natural instinct to seek safety at night. Placing the waterer in a corner with a drainage-friendly floor, like gravel or a raised platform, prevents the bedding from becoming a sodden mess.
How to Implement a Streamlined System
Building a high-efficiency coop requires specific measurements and materials. Success starts with the roosting bars. Standard breeds require roughly 10 to 12 inches (25 to 30 cm) of linear space per bird. Using a 2×4 piece of lumber with the 4-inch (10 cm) side facing up is widely considered the gold standard. This flat surface allows chickens to sit on their feet, covering their toes with feathers for warmth in the winter and preventing frostbite.
Mount these roosts approximately 18 to 24 inches (45 to 60 cm) from the floor. Directly beneath these bars, install your droppings boards. These are flat shelves, often made of plywood covered in linoleum or a similar non-porous material, extending 6 to 8 inches (15 to 20 cm) beyond the roost on all sides. This shelf catches the night’s waste, keeping the floor bedding pristine for months at a time.
The Daily Maintenance Process
Execution of the 5-minute routine is simple. Every morning, use a 12-inch (30 cm) metal taping knife or a specialized coop scraper to pull the manure off the droppings boards into a bucket. This task takes seconds because the manure is fresh and hasn’t been trampled into the bedding. Dumping this bucket directly into a compost bin provides a concentrated source of nitrogen for your garden.
Once the boards are scraped, check the water and feed. Gravity-fed systems and nipple waterers are the most efficient choices, as they prevent contamination from dust and bedding. Finally, reach into the nesting boxes—ideally from an external hatch—to collect the day’s eggs. Because the chickens haven’t been pooping in the nests, the eggs stay clean, eliminating the need for washing and preserving the natural “bloom” that keeps them fresh longer.
Benefits of a Streamlined System
The advantages of a streamlined coop extend far beyond time savings. Health is the primary beneficiary. Ammonia, a byproduct of decomposing manure, is a silent killer in the poultry world. It irritates the chickens’ delicate respiratory systems and can lead to blindness or chronic illness. Removing the bulk of the manure daily via droppings boards virtually eliminates ammonia odors, even in the heat of summer.
Financial savings are another measurable benefit. When manure is caught on boards, the floor bedding (such as pine shavings or hemp) stays clean and dry. Instead of stripping the coop floor every week, you might only need a full clean-out once or twice a year. This reduces the cost of bedding materials significantly. Furthermore, clean eggs have a higher market value and lower risk of bacterial contamination, providing peace of mind for the homestead kitchen.
- Reduced Disease Pressure: Lowering the moisture and manure load reduces the habitat for coccidiosis and internal parasites.
- High-Quality Compost: Pure manure from boards is easier to manage in a compost pile than manure mixed with massive amounts of carbon-heavy bedding.
- Predator Awareness: A tidy coop allows you to spot gaps, chew marks, or signs of intrusion much faster than a cluttered one.
- Ergonomic Comfort: Designing for access means no more crawling into small spaces or straining your back to reach the back corners.
Challenges and Common Mistakes
Many keepers fail because they treat the coop as a static structure rather than a living environment. One common pitfall is installing droppings boards that are too narrow. If the board doesn’t extend far enough, manure will still land in the floor litter, defeating the purpose. Another mistake is using porous materials for the boards. Unsealed wood absorbs moisture and odors, making it impossible to clean and eventually leading to rot.
Ventilation is often misunderstood and can become a major challenge. Some keepers mistake “drafty” for “ventilated.” Proper ventilation should occur well above the roosting bars—ideally 1.5 feet (45 cm) higher—to allow warm, moist air and ammonia to escape without blowing directly on the birds. Failing to provide this vertical space results in moisture buildup, which is the leading cause of frostbite in cold climates.
Neglecting the “dust factor” is another frequent error. Chickens create an incredible amount of dander and dust. If your coop layout includes many flat ledges, nooks, and crannies, dust will accumulate and harbor mites or respiratory irritants. Efficient designs use sloped tops for nesting boxes and storage bins to ensure chickens can’t roost on them and dust doesn’t settle as easily.
Limitations and Environmental Constraints
No system is perfect for every situation. In extremely cold environments, manure can freeze to the droppings boards overnight. This makes the morning scrape much more difficult, requiring a heavy-duty metal scraper or a wait until the sun warms the coop. In these cases, some keepers prefer a “deep litter” approach for the winter months to provide supplemental heat through decomposition, though this requires a much larger volume of carbon material.
Flock size also dictates the feasibility of certain layouts. A small backyard coop for three hens is easy to manage with a single board. However, a commercial-scale flock of 50 or more birds requires significant square footage of droppings boards, which can become heavy and cumbersome. In larger setups, the structural integrity of the roosting system must be reinforced to handle the weight of both the birds and the accumulated waste.
Building codes and space constraints may also limit your layout. If you are working with a pre-fabricated coop, you might find the interior dimensions too cramped to add efficient features like boards or external nest boxes. In these scenarios, the trade-off is often more manual labor in exchange for a smaller footprint. Always measure your interior height to ensure you have enough room for the roost, the board, and the necessary clearance above the birds’ heads.
Comparison: Droppings Boards vs. Deep Litter Method
Choosing between these two popular systems depends on your climate and your available time. The droppings board method is a high-frequency, low-effort system. The deep litter method is a low-frequency, high-effort system. One focuses on removal, while the other focuses on onsite composting.
| Feature | Droppings Boards | Deep Litter Method |
|---|---|---|
| Daily Effort | 2-5 Minutes (Scraping) | Minimal (Occasional stirring) |
| Clean-out Frequency | 1-2 Times per year | Once per year (Heavy labor) |
| Odor Control | Excellent (Removal of waste) | Good (If managed correctly) |
| Bedding Cost | Low (Bedding stays clean) | High (Requires 6-12 inches) |
| Winter Heat | None | Provides natural microbial heat |
Practical Tips for a Productive Coop
Applying these best practices immediately improves the quality of your chicken keeping experience. Start with the right tools. A high-quality metal scraper with a comfortable grip is non-negotiable. Keep a dedicated 5-gallon (19-liter) bucket with a lid near the coop entrance. This prevents you from hunting for supplies every morning and ensures the manure is contained during transport to the compost pile.
Consider using a drying agent on your droppings boards after scraping. A light dusting of Sweet PDZ (zeolite) or construction-grade sand helps absorb any remaining moisture and neutralizes odors instantly. This is particularly effective during humid seasons when damp manure can attract flies. Sand is also an excellent additive for the garden, helping to break up heavy clay soils over time.
Organizing your feed storage is another quick win. Use galvanized metal bins with tight-fitting lids to deter rodents. Mounting these bins on blocks or a platform keeps them away from ground moisture. If possible, place the bins just outside the coop or in a “clean vestibule” so you don’t have to carry heavy bags through the birds’ living area. This reduces stress for the flock and saves your back from unnecessary lifting.
- Sift the Sand: If you use sand as a floor bedding, a long-handled sifter (similar to a large kitty litter scoop) makes daily spot-cleaning effortless.
- Automate the Door: Installing an automatic coop door is the single best investment for time management. It ensures birds are safe at dusk even if you aren’t home.
- Gravity Feeders: Switching from open troughs to port-style gravity feeders drastically reduces wasted feed and prevents birds from pooping in their food.
- Light the Way: A simple solar-powered light inside the coop can help you perform evening health checks without fumbling for a flashlight.
Advanced Considerations for the Serious Practitioner
For those looking to scale their operations or achieve maximum self-reliance, advanced manure management is the next step. Instead of simply composting the manure, some practitioners use “vermicomposting” (worm composting). By introducing composting worms to the manure collected from boards, you can produce high-value worm castings while simultaneously creating a protein-rich snack for your chickens.
Ergonomics should be taken to the next level in a permanent coop. Building a walk-in coop with a 6-foot (1.8-meter) ceiling height allows you to maintain the space without bending over. If you are building a new structure, consider a concrete floor with a slight pitch toward a floor drain. While the initial cost is higher, the ability to pressure-wash the entire space once a year is a game-changer for long-term sanitation.
Genetic considerations also play a role in coop efficiency. Heavier breeds like Brahmas or Orpingtons produce more waste and require sturdier roosts than lighter breeds like Leghorns. If your layout is optimized for efficiency, you can handle larger breeds with ease. However, if your coop is small, selecting smaller “bantam” breeds or efficient layers can reduce the overall “manure load,” making your streamlined system even more effective.
Example Scenario: The 10-Minute Morning
To understand how these pieces fit together, let’s walk through a typical morning on a streamlined homestead. At 7:00 AM, the automatic door opens, letting the hens into the secure run. You arrive at the coop at 7:15 AM, carrying nothing but a small handful of scratch grains and an egg basket. You enter the clean zone and immediately open the external nest box hatch.
You find six clean eggs, place them in the basket, and close the hatch. Next, you step inside the coop. You take the scraper hanging on a peg by the door and spend 90 seconds pulling the manure from the droppings boards into a bucket tucked under the roost. You sprinkle a handful of zeolite on the board and hang the scraper back up. You glance at the gravity feeder and the nipple waterer—both are half-full and clean. You toss the scratch grains into the run to encourage foraging and head back to the house.
The total time elapsed is six minutes. Because the layout was designed for this specific flow, there was no need to hunt for tools, no need to scrub dirty eggs, and no need to wade through soiled bedding. This is the difference between keeping chickens as a hobby and running a streamlined homestead system. The physical labor is minimal, leaving you energized for the rest of your day’s work.
Final Thoughts
Efficiency in the chicken coop is the foundation of a sustainable homestead. By shifting your focus from “cleaning up messes” to “managing a system,” you reclaim hours of your life every month. The organized chicken coop layout is not a luxury; it is a necessity for anyone who wants to provide a healthy environment for their flock without sacrificing their own time and well-being.
Implementing droppings boards, optimizing your roosting bars, and zoning your workspace are the first steps toward poultry-keeping mastery. These changes require a small initial investment of time and materials but pay dividends for years to come. Clean coops lead to healthy birds, and healthy birds lead to a productive homestead. Start with one modification this weekend, and experience the relief of a chore that finally feels like a joy rather than a burden.
As you refine your routine, keep an eye on the details of your flock’s behavior. Every coop is unique, and your birds will often show you where the system needs tuning. Experiment with different bedding materials and tool placements until the workflow feels like second nature. With a bit of pioneer-grit and a smart plan, you can turn your coop into the most efficient part of your homesteading life.