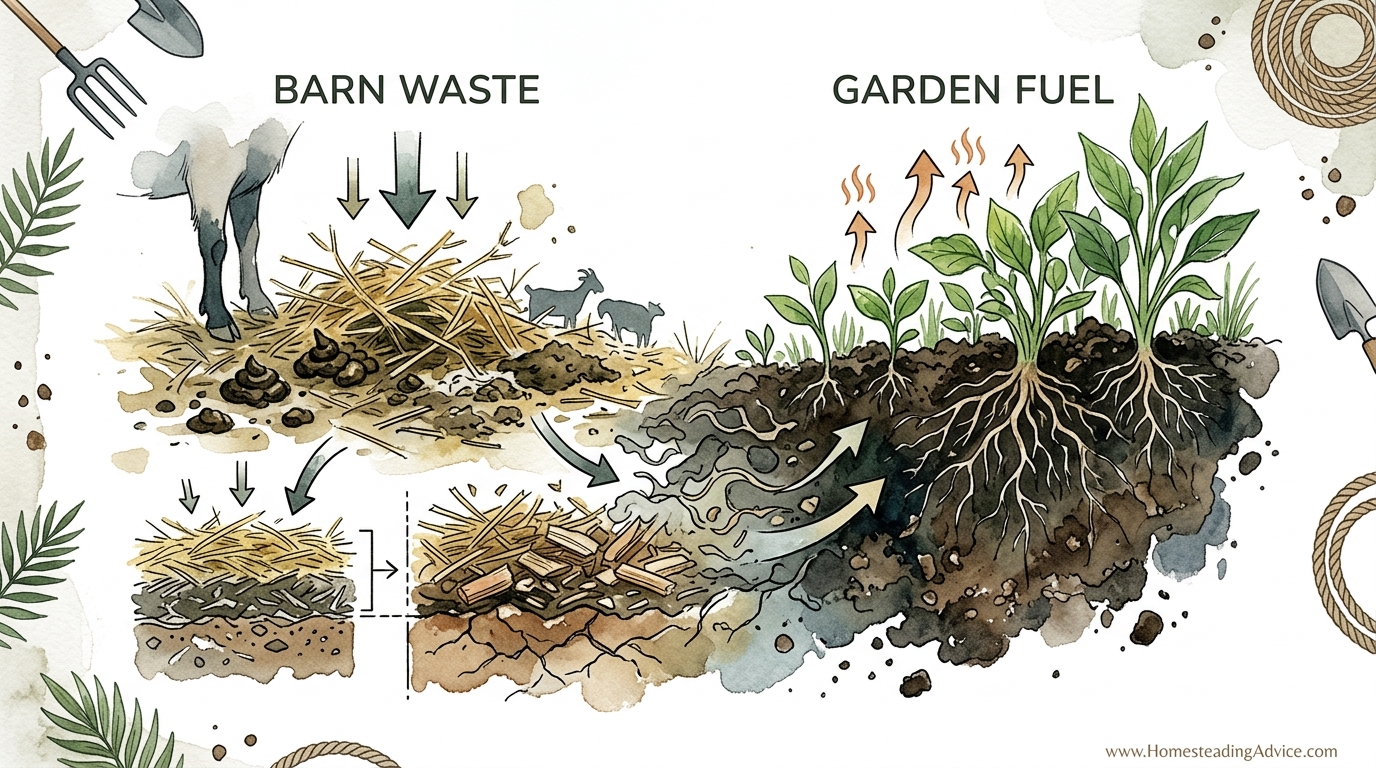
If your barn smells like ammonia, you’re literally watching your garden’s fertility evaporate into the air. Daily mucking is a chore that treats manure like trash. The Deep Litter method treats it like a resource. Layering carbon-rich materials creates a slow-cooker of fertility right under your goats’ feet, keeping them warm in winter and your garden fed in spring.
Most folks start keeping goats and think they have to sweep the floor every single morning. That approach certainly keeps things tidy, but it also strips the barn of natural insulation. Traditional mucking wastes hours of labor and leaves you with a pile of “hot” manure that takes a year to break down before it can touch a tomato plant.
The Deep Litter method mimics the natural cycle of a forest floor. In the woods, leaves fall, animals pass through, and the earth steadily absorbs the waste, turning it into rich, black soil. You can recreate this cycle inside your barn to save your back and improve your herd’s health.
This system is not about being lazy. It is about working with biology instead of fighting it. When you manage the layers correctly, you create an aerobic environment where beneficial microbes thrive. These tiny workers break down waste, lock in nitrogen, and generate enough heat to keep a newborn kid cozy during a blizzard.
How To Use Deep Litter Method For Goats
The Deep Litter method is a waste management system where you allow bedding and manure to accumulate and compost in place over several months. Instead of stripping the floor down to the dirt or concrete every day, you simply add fresh, dry material on top of the old. This creates a thick, fermenting “cake” that serves as both a mattress and a heater for your goats.
This method exists because goats are notorious for wasting hay and creating localized “wet spots” where they sleep or eat. In a traditional system, that wasted hay is a nuisance. In a deep litter system, that hay becomes the carbon source that fuels the composting process. It is used primarily in colder climates or by homesteaders who want to maximize their garden’s output with high-quality compost.
Think of the barn floor as a giant, slow-motion compost bin. You are the manager of a microbial workforce. As the goats add nitrogen through their manure and urine, you add carbon through straw, wood shavings, or wood chips. The bottom layers begin to decompose, while the top layer stays dry and clean for the animals to lie on.
Real-world application usually follows a seasonal cycle. Most goat keepers start a fresh “pack” in the late autumn as temperatures drop. The bedding builds up through the winter, providing a warm base. Once the spring thaw arrives, the entire mass is dug out and moved to the garden or a secondary composting pile.
The Step-By-Step Process of Building a Deep Pack
Setting up a successful deep litter system requires a plan. You cannot simply stop cleaning and expect things to go well. Without a proper base and consistent management, you will end up with a soggy, stinking mess that invites hoof rot and flies.
First, start with a clean, dry floor. If you have a dirt floor, ensure it is well-drained. For concrete or wood floors, you must be more vigilant about moisture. Sprinkle a liberal layer of garden lime or a specialized stall refresher like Sweet PDZ. This base layer helps neutralize odors and absorbs the initial moisture before the microbial action kicks in.
Second, lay down your foundation. This should be about 4 to 6 inches (10 to 15 cm) of high-carbon material. Pine shavings are an excellent choice for this base because they are highly absorbent. Straw can also work, but it tends to mat down more quickly.
Third, observe your goats’ habits. Goats usually pick a favorite corner for sleeping and another for eating. The area under the hay feeder will accumulate waste faster than anywhere else. Use a pitchfork to spread out the wasted hay and manure evenly across the floor rather than letting it pile up in one spot.
Fourth, add fresh bedding whenever the surface looks damp or smells like anything other than earth. In a healthy system, the floor should feel dry to the touch. If you kneel on the bedding and your pants get damp, you need more carbon. Aim for a “top-dressing” of fresh material at least once or twice a week, depending on your stocking density.
How the “Slow Cooker” Generates Heat
The magic of this method happens in the middle and bottom layers. As the nitrogen from the urine and manure mixes with the carbon of the straw or wood, aerobic bacteria begin to work. This process releases heat as a byproduct of decomposition.
In a well-managed barn, the temperature of the internal litter pack can reach 10°F to 15°F (5.5°C to 8°C) higher than the outside air. During a brutal winter night, that radiant heat is the difference between a stressed goat and a comfortable one. Newborn kids benefit the most, as the warm bedding prevents their body heat from being sucked into a cold concrete floor.
Oxygen is the fuel for these microbes. Unlike a garden compost pile that you turn with a shovel, you generally do not want to flip the deep litter in a goat barn. Flipping it releases the trapped heat and can cause a massive spike in ammonia. Instead, the goats’ natural movement and “rooting” (if you have a mixed barn with pigs or chickens) provide enough aeration to keep the process moving slowly.
Moisture control is the most critical part of this “slow cooker” effect. Too little moisture and the microbes go dormant. Too much moisture and the system turns anaerobic, which creates the foul “rotten egg” or ammonia smell. You are looking for a damp-sponge consistency in the bottom layers, while the top 3 inches (7.5 cm) remain bone-dry.
Benefits of the Deep Litter Method
One of the most immediate benefits is the massive reduction in daily labor. Traditional mucking takes roughly 26 to 30 hours per year for a small herd. Managing a deep litter pack usually cuts that time down to about 16 hours, most of which is concentrated into two big “clean-out” days in the spring and fall.
Insulation is another major advantage. A thick pack of 12 to 18 inches (30 to 45 cm) of bedding acts as a thermal barrier. It prevents the cold from the ground from reaching the animals. This is especially useful in regions where the ground freezes solid for several months.
Fertility is the ultimate prize for the gardener. Manure that has sat in a deep litter pack is partially “cured.” It has already begun the transition into humus. When you finally dig it out, you are handling a rich, dark material that is far more stable and nutrient-dense than raw manure. It won’t “burn” your plants as easily and is packed with beneficial fungi and bacteria.
Hoof health can actually improve in a dry deep litter system. The soft, spongy surface provides excellent cushioning for the goats’ joints. It also helps naturally wear down hooves if you include some coarser wood chips in the mix.
Challenges and Common Mistakes
The biggest mistake beginners make is failing to provide enough carbon. If you can smell ammonia, you have a nitrogen-heavy environment. Ammonia is a gas that is lighter than air, but it lingers at the level of a goat’s nose. Constant exposure to these fumes can cause permanent respiratory damage and predispose your herd to pneumonia.
Poor ventilation is the second most common pitfall. Many people try to seal their barns tight to keep the heat in. This is a recipe for disaster. You must have airflow near the ceiling to allow moisture and any stray ammonia to escape. A “tight” barn with deep litter will become a humid, moldy swamp within weeks.
Clogged doors often surprise new practitioners. As the bedding rises from 4 inches (10 cm) to 18 inches (45 cm), your barn doors might no longer swing open. Plan for this by using “threshold boards” or removable slats at the door entries. These keep the bedding contained while allowing you to step over and into the barn.
Ignoring “wet spots” leads to health issues. If a water bucket leaks or a goat has a favorite spot to urinate, that area will become a breeding ground for pathogens. You must spot-clean these saturated areas or add twice as much carbon to balance the moisture.
Limitations and Environmental Constraints
This method is not ideal for every climate. In extremely humid or tropical regions, the air never stays dry enough to keep the top layer of bedding crisp. In these environments, deep litter often becomes a soggy mess that promotes fungal growth and attracts flies. A “shallow bedding” method with weekly clean-outs is usually better for the Deep South or maritime climates.
Small, cramped stalls also present a challenge. If the goats are confined 24/7 in a small space, the volume of manure will quickly overwhelm the carbon. This method works best when goats have access to an outdoor run during the day and only use the barn for sleeping and shelter from rain.
Concrete floors require extra care. On a dirt floor, some excess liquid can drain into the earth. On concrete, the liquid has nowhere to go. You must use a very absorbent base layer, like pelleted pine bedding, to prevent urine from pooling at the bottom and turning the whole pack anaerobic.
Parasite management is a debated topic in deep litter circles. While the heat of a working pack can kill many parasite eggs, a cold or poorly managed pack can actually preserve them. If your herd has a known heavy load of “barber pole” worms or coccidia, you may want to avoid deep litter until you have the infestation under control.
Bedding Material Comparison
Selecting the right material is a balance of cost, availability, and absorbency. Not all carbon is created equal.
| Material | Pros | Cons | Best Use |
|---|---|---|---|
| Straw | Highly insulating, cheap, easy to handle. | Low absorbency, mats down quickly, can be dusty. | Top layer for warmth and “fluff.” |
| Pine Shavings | Very absorbent, smells great, easy to spot clean. | More expensive, sticks to goat coats. | Base layer and moisture management. |
| Wood Chips | Provides structure, excellent drainage, very durable. | Takes a long time to compost, hard to move by hand. | Foundational base layer in permanent barns. |
| Wasted Hay | Free, already in the barn, goats do the “layering.” | Can harbor mold if wet, attracts rodents. | Filler material for bulk. |
Practical Tips for Success
Start your deep litter pack before the first hard frost. Microbes need a little bit of warmth to begin their colonization. If you wait until it is 10°F (-12°C) outside to start your pack, the material will likely just freeze instead of composting. Establishing the “living” floor in the autumn ensures the heater is running by mid-winter.
Use the “Squeeze Test” to monitor moisture. Reach down into the middle layer of the bedding and grab a handful. Squeeze it hard. If water drips out, it is too wet; add more shavings immediately. If it feels like dry dust and falls apart, it is too dry; the goats’ urine should provide enough moisture, but in very dry climates, you might actually need to sprinkle a little water to keep the microbes alive.
Keep your waterers outside if possible. A single knocked-over 5-gallon (19-liter) bucket can ruin months of careful layering. If you must keep water inside, place it on a raised platform or in a corner with extra-heavy drainage like a gravel pit under the bedding.
Feed your hay in a way that encourages goats to spread it. Some people hate wasted hay, but in a deep litter system, that “waste” is your primary carbon source. Allow the goats to drop about 10% of their hay on the floor. This provides a fresh, clean-smelling top layer every single day.
Advanced Considerations: Inoculating the Litter
Serious practitioners often “inoculate” their fresh bedding to jumpstart the process. You can do this by taking a few shovelfuls of half-finished compost from a previous year and sprinkling it over the new base layer. This introduces the specific bacteria and fungi needed to break down goat waste.
Another advanced technique is the use of “EM” (Effective Microorganisms) sprays. These liquid solutions contain lactic acid bacteria and yeasts that accelerate decomposition and aggressively compete with odor-causing bacteria. Spraying a diluted solution over the floor once a month can virtually eliminate ammonia smells even in high-traffic barns.
Consider the “pigs and chickens” synergy. If you have a large barn, allowing a few chickens to have access to the goat bedding can be beneficial. They will scratch through the layers, eating fly larvae and keeping the top layer aerated. Just be careful that the chickens don’t roost above the goats and create a secondary mess.
Plan your clean-out for when the moon is waning or during a dry spell. Digging out a year’s worth of deep litter is a monumental task. The material will be heavy and dense. If you have a tractor with a front-end loader, ensure your barn doors are wide enough to accommodate the machinery. If you are working by hand, use a sturdy garden fork rather than a shovel.
Scenario: A Typical Winter on the Homestead
Imagine a small homestead in a northern climate with four Nigerian Dwarf goats. In late October, the owner clears the barn and lays down 2 inches (5 cm) of pine pellets and 4 inches (10 cm) of golden straw. Every morning, the goats pull hay from their feeder, eating the best parts and dropping the stalks.
By December, the bedding has risen to 8 inches (20 cm). Outside, the temperature is 15°F (-9°C), but inside the barn, the air is still. The owner sticks a hand into the bedding and feels a distinct warmth radiating from below. There is no smell of urine, only the faint scent of pine and dried grass.
In February, a “kidding” occurs. The owner doesn’t need a heat lamp because the thick, dry pack provides a soft, warm nest for the new kids. The bedding is now 14 inches (35 cm) deep. The goats’ hooves are clean and dry because the owner has been adding a fresh flake of straw every three days.
Come April, the snow melts. The goats move to the pasture during the day. The owner opens the barn wide and spends a Saturday morning pitching the “cake” into a wheelbarrow. The bottom 6 inches (15 cm) are dark, crumbly, and teeming with worms. This material goes straight into the potato patch, promising a record harvest for the coming fall.
Final Thoughts
The Deep Litter method is a testament to the wisdom of working with nature. It transforms a daily burden into a bi-annual harvest of fertility. While it requires a sharp eye for moisture and a commitment to adding carbon, the rewards are measurable in both saved time and improved animal welfare.
Experiment with different bedding materials available in your area. You may find that a mix of wood chips and wasted hay works better for your specific barn than pure straw. Listen to your nose; it is the best diagnostic tool you have. As long as the barn smells like a forest floor, your goats are healthy and your garden fuel is “cooking” just right.
Applying these principles will change the way you look at your barn. You’ll stop seeing manure as a waste product to be hidden and start seeing it as the foundation of your farm’s productivity. Embrace the slow-cooker method, and your goats—and your garden—will thank you for years to come.