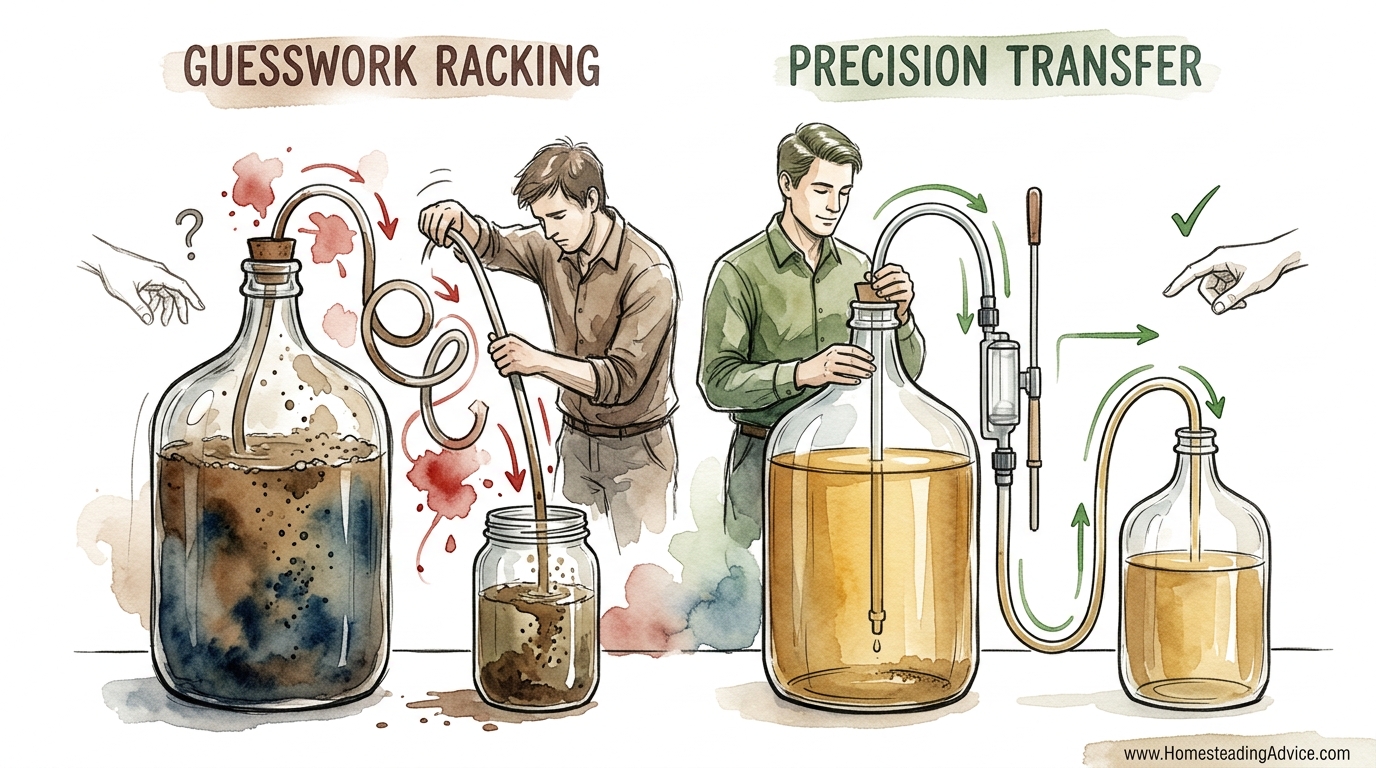
Most homebrewers bottle too early and ruin their vintage with yeast-bite; here is how the masters ensure clarity. That ‘homebrew aftertaste’ isn’t the honey – it’s the dead yeast you’re accidentally bottling. Precision racking is the difference between a cloudy amateur experiment and a crystal-clear masterpiece that wins awards.
You have spent weeks watching bubbles rise in your airlock, smelling the sweet, floral promise of fermenting honey. It is tempting to grab a glass and pour a sample as soon as the activity slows. But the truth is that your mead is currently a graveyard of spent yeast and honey solids. If you bottle now, those solids will break down into a muddy, rubbery flavor that no amount of aging can fix.
Mastering the art of the transfer is what separates the casual hobbyist from the true craftsman. It requires patience, a steady hand, and an understanding of the delicate dance between gravity and sediment. This guide will walk you through the grit and grace of racking mead, ensuring your final pour is as brilliant as liquid gold.
How To Rack Mead Like A Pro
Racking is the fundamental process of siphoning fermented liquid from one vessel to another, intentionally leaving behind the thick layer of sediment at the bottom. In the world of mead, this sediment is known as “lees.” Racking isn’t just about making the drink look pretty; it is a critical step in flavor development and biological stability.
When you rack your mead, you are effectively “cleaning” it. By moving the liquid into a secondary vessel, you remove it from the influence of decomposing yeast cells and organic debris. This process allows the mead to clarify naturally over time, exposing the subtle nuances of the honey that were previously masked by the haze of fermentation.
In real-world application, professional meadmakers often rack their batches multiple times. Each transfer further refines the liquid, moving it from the “gross lees” of primary fermentation to the “fine lees” of the secondary stage, and eventually into a state of total clarity. Think of it like filtering a stream; the more times the water settles in a calm pool, the clearer it becomes at the end of the run.
The Science of Sediment: Gross Lees vs. Fine Lees
Understanding what is sitting at the bottom of your carboy is the first step toward precision. Not all sediment is created equal, and knowing the difference determines how fast you need to act.
Gross Lees are the heavy, chunky sediments that fall out of suspension during the first 7 to 14 days of fermentation. These consist of large clusters of yeast, bits of honey wax, and—if you are making a melomel—fruit skins and seeds. These solids are volatile. If left in contact with your mead for too long, they can undergo autolysis, where the dead yeast cells rupture and release nitrogenous compounds that taste like burnt rubber or old cheese.
Fine Lees are the silky, dust-like particles that settle much more slowly, often over several months. These are mostly individual yeast cells that have finally finished their work. Unlike gross lees, fine lees can sometimes be beneficial. Some traditional styles utilize “sur lie” aging, where the mead sits on these fine cells to develop a creamy mouthfeel and notes of fresh bread or toasted nuts. However, for most beginners, the goal is to leave all lees behind to ensure a crisp, clean finish.
Equipment for a Clean Transfer
You do not need a laboratory-grade pump to achieve professional results, but you do need the right tools for a gravity-fed system. Precision racking relies on a few key pieces of gear that minimize the risk of ruining your batch.
- Auto-Siphon: This is a modern marvel for the homebrewer. It is a pump-action tube that starts the flow of liquid without the need for manual suction. Using your mouth to start a siphon is an ancestral method, but it introduces bacteria that can turn your honey wine into vinegar.
- Food-Grade Tubing: You generally want 5/16-inch (8mm) or 3/8-inch (9.5mm) vinyl or silicone tubing. Silicone is preferred by those who like to boil their equipment for sterilization, as it handles high heat better than vinyl.
- Racking Cane: If you aren’t using an auto-siphon, a rigid racking cane with a “sediment tip” is essential. This small plastic cap on the bottom of the tube ensures you pull liquid from above the lees rather than sucking them straight off the floor of the vessel.
- Secondary Vessel: This should be a clean, sanitized carboy, preferably made of glass. Glass is impermeable to oxygen, making it the ideal choice for long-term aging. Ensure this vessel is smaller than your primary bucket to minimize “headspace”—the air gap between the liquid and the lid.
- Sanitizer: A no-rinse sanitizer like Star San is non-negotiable. Every surface that touches your mead must be surgically clean.
When to Rack: Timing Your Mead
One of the most common questions in meadmaking is “When is it time to move?” Relying on the calendar is a mistake. The yeast doesn’t care about your schedule; it cares about sugar levels and temperature.
The only way to know for certain is by using a hydrometer. This tool measures the specific gravity (SG) of your liquid. When your mead reaches its final gravity—usually between 1.000 and 0.996 for a dry mead—and that reading stays the same for three consecutive days, fermentation is officially over. This is the “Precision Transfer” window.
If you rack too early, you might stall the fermentation before the yeast has finished its job, leading to a cloyingly sweet and unstable product. If you rack too late—waiting months after the bubbles have stopped—you risk the dreaded yeast-bite. A good rule of thumb is to perform the first racking within 2 to 4 weeks of starting your batch, provided the hydrometer says the yeast has finished the heavy lifting.
Visual Cues for the Observant Brewer
While the hydrometer is king, your eyes can tell you a lot. Look for a distinct separation between the clear liquid at the top and the thick, creamy sludge at the bottom. When the “cap” of bubbles on the surface has completely dissipated and the mead begins to look slightly translucent when a flashlight is held against the glass, you are ready to prepare for the transfer.
Step-By-Step Racking Guide
Preparation is half the battle. If you rush the process, you will kick up the sediment you’re trying to avoid. Follow this method to ensure a clean, award-winning clarity.
- Set the Stage: Move your primary fermenter to a high surface, like a sturdy table or countertop, at least 24 hours before you plan to rack. This allows any sediment disturbed during the move to settle back down to the bottom.
- Sanitize Everything: Soak your siphon, tubing, secondary carboy, and airlock in sanitizer. Do not forget to sanitize your hands.
- Position the Receiver: Place your empty, sanitized secondary vessel on the floor or a lower chair. The greater the vertical distance (drop) between the two vessels, the stronger the siphon pull will be.
- Prime the Siphon: Insert the racking cane or auto-siphon into the full vessel. Keep the tip about 2 inches (5cm) above the sediment layer. Start the flow. If using an auto-siphon, a single firm stroke is usually enough.
- Minimize Splashing: Direct the exit end of the tubing to the very bottom of the receiving carboy. You want the liquid to fill from the bottom up, with the tube submerged as quickly as possible. This prevents “aeration,” which is the enemy of finished mead.
- Monitor the Level: As the liquid level in the primary vessel drops, slowly lower your racking cane to follow it. Watch the sediment layer closely. The moment you see the first hint of “cloud” entering the tube, stop the siphon. It is better to lose half a glass of mead than to ruin five gallons with cloudiness.
- Seal It Up: Fill the secondary vessel as high as possible, leaving only about an inch (2.5cm) of space below the stopper. Install a sanitized airlock filled with water or cheap vodka.
Benefits of Secondary Fermentation
While the name “secondary fermentation” is a bit of a misnomer—since most of the fermentation should be finished—this stage is where the magic happens. By racking into a clean vessel, you provide an environment where the mead can age gracefully.
The primary benefit is clarification. Without the constant churn of active fermentation, the remaining fine particles can finally succumb to gravity. A mead that sits in secondary for three months will often be clear enough to read a newspaper through.
Furthermore, secondary aging allows for flavor maturation. Freshly fermented mead often has “hot” alcohol notes that taste like rocket fuel. Time in a secondary vessel allows these harsh alcohols to mellow out and merge with the honey’s floral esters. It also provides the perfect opportunity to add “post-fermentation” ingredients like oak spirals, vanilla beans, or spices, which would have had their delicate aromas blown out by the vigorous CO2 production of the primary stage.
Common Racking Mistakes to Avoid
Even experienced brewers can slip up. Avoiding these pitfalls will save you from the heartbreak of a spoiled batch.
1. The “Gurgle” of Death: If your tubing is loose or has a crack, it might suck in air along with the mead. This looks like bubbles traveling through the line. This is oxygenation in real-time. Oxygen after fermentation leads to cardboard flavors or vinegar. Ensure all connections are airtight.
2. Greedy Racking: Trying to get every last drop of mead is a recipe for disaster. If you suck up even a small amount of lees, you have effectively reset the clock on your clarity. Be disciplined; sacrifice the “dregs” for the sake of the vintage.
3. Too Much Headspace: If you move 4 gallons (15 liters) of mead into a 5-gallon (19-liter) carboy, you are leaving a massive pocket of air. This air contains oxygen that will degrade your mead over months of aging. Always match your vessel size to your batch volume. If you have a gap, you can “top off” with a similar mead or a sanitized honey-water mixture (though the latter may restart fermentation).
Limitations: When Racking Isn’t Enough
Racking is a powerful tool, but it is not a magic wand. There are situations where a simple transfer won’t solve your problems.
If your mead is cloudy due to pectin haze—common when using fruits like apples or berries—no amount of racking will clear it. Pectin is a structural glue in fruit that stays suspended in the liquid. In these cases, you need a pectic enzyme, not a siphon.
Environmental factors also play a role. If your cellar or brewing room is too warm (above 75°F or 24°C), the yeast may stay in suspension longer. Conversely, if it is too cold, the yeast might go dormant before they finish, leaving you with a “stuck” fermentation that racking won’t fix. Always check your gravity before you move.
Comparing Racking Methods
While the gravity siphon is the standard, there are other ways to move your nectar. Each has its place depending on your skill level and budget.
| Method | Complexity | Risk of Oxidation | Best For |
|---|---|---|---|
| Manual Gravity Siphon | Low | Medium | Beginners on a budget |
| Auto-Siphon | Low | Low | Standard homebrewing |
| Closed-Loop CO2 Transfer | High | Zero | Professional-level results |
| Vacuum Racking | Medium | Low | Removing gas while transferring |
For the serious practitioner, GUESSWORK RACKING (just moving it when you think it looks “done”) is never an option. PRECISION TRANSFER (using gravity readings and closed systems) is the only way to ensure consistency across batches.
Practical Tips for Crystal Clarity
If you want your mead to shine like a jewel, consider these best practices from the masters.
- Cold Crashing: Before racking, place your carboy in a refrigerator (35°F–40°F or 2°C–4°C) for 48 to 72 hours. The cold temperature shocks the remaining yeast and particles, forcing them to drop to the bottom much faster. This creates a more compacted sediment layer that is easier to rack off of.
- Using Fining Agents: If your mead refuses to clear after a month in secondary, you can use fining agents like Bentonite, Sparkalloid, or Super-Kleer. These work like magnets, binding to cloud-causing particles and pulling them to the bottom.
- Degassing: Mead often holds onto dissolved carbon dioxide. If you don’t remove this gas, it can keep tiny particles floating in suspension. Gently stirring your mead with a sanitized “degassing wand” before the final racking can help the clarity significantly.
Advanced Considerations: The Physics of the Siphon
For those who want to go beyond the basics, understanding the physics of the transfer can improve your efficiency. The flow rate of your mead is determined by the Bernoulli principle. The pressure difference created by the height of the liquid column is what drives the movement.
If the flow is too fast, it can create a vortex at the bottom of the primary vessel, which pulls up the very sediment you’re trying to avoid. To control this, you can use a small plastic clamp on your tubing to “throttle” the flow. A slower, steadier transfer is always superior to a fast, turbulent one.
Scaling up also introduces challenges. If you are moving 50 gallons (190 liters) instead of 5 (19 liters), gravity siphons become impractical. At this level, peristaltic pumps are used. These pumps squeeze the outside of the tubing to move liquid, ensuring the mead never touches mechanical parts, which maintains both sanitation and a lack of aeration.
Racking Scenario: The Traditional 5-Gallon Batch
Imagine you have a 5-gallon (19-liter) batch of traditional Orange Blossom Mead. It has been 21 days since you pitched the yeast. The airlock has stopped bubbling. Your hydrometer shows a reading of 1.000.
You move the bucket to the counter on Friday night. On Saturday morning, you see a thick, 1-inch (2.5cm) layer of white yeast at the bottom. You sanitize your 5-gallon glass carboy and your auto-siphon. You start the transfer, keeping the exit hose at the bottom of the carboy.
As the liquid nears the bottom of the bucket, you notice the white sludge start to shift toward the siphon tip. You immediately pull the siphon out. You have lost about 12 ounces (350ml) of liquid, but the 4.9 gallons (18.5 liters) you saved are beautiful and free of gross lees. You seal it with an airlock and tuck it into a dark corner for the next three months. This is the path to excellence.
Final Thoughts
Racking is the bridge between a raw fermentation and a refined beverage. It is a process that rewards the patient and punishes the hasty. By understanding the nature of the lees and mastering the mechanics of the siphon, you protect the delicate flavors of the honey you have worked so hard to ferment.
The “homebrew aftertaste” is not a badge of honor; it is a sign of a process cut short. When you take the time to rack with precision, you are honoring the ancestral wisdom of the brewers who came before you, while using the best of modern tools to ensure success.
Do not be afraid to let your mead sit. Time is the greatest fining agent of all. Whether you are aiming for a dry, crisp hydromel or a heavy, sweet sack mead, the clarity of your final product will be a testament to your grit as a maker. Apply these techniques to your next batch, and watch as the clouds part to reveal a masterpiece.