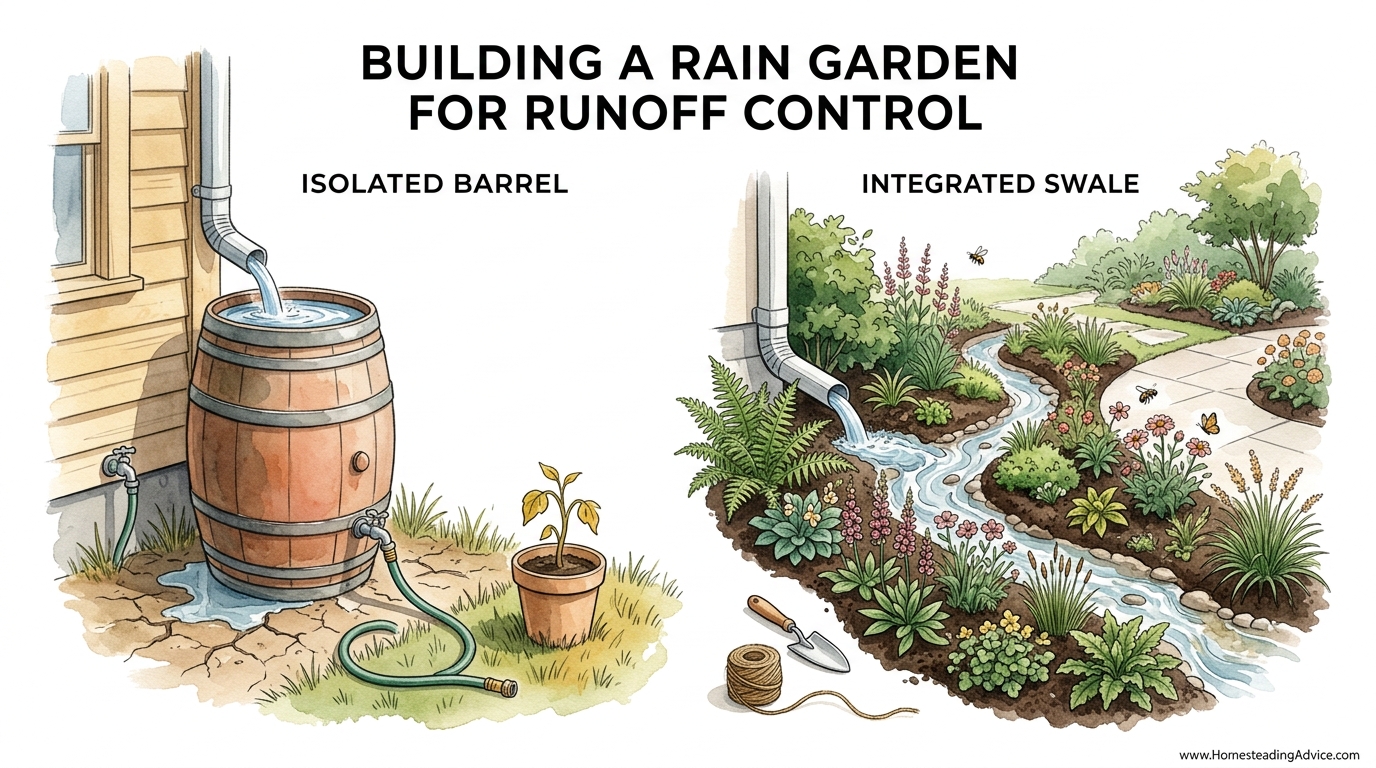
A barrel holds gallons, but a healthy landscape can hold millions. Tanks are great for the kitchen, but the soil is the best place to store water for the garden. An integrated rain garden captures the ‘overflow’ and sinks it deep into the earth, recharging your groundwater and feeding your plants for weeks after the rain stops. Stop catching rain in a cup; catch it with the earth.
There is a profound sense of security in knowing that your land is working for you, even when you aren’t standing on it. In the old days, folks understood that water was life, but they also knew it could be a destructive force if left to its own devices. Today, we often treat rain as a nuisance to be hurried off our property through pipes and gutters. This approach robs our gardens of the very sustenance they crave and sends a toxic cocktail of oils and debris into our local waterways.
By shifting our perspective, we can turn a problem—stormwater runoff—into a permanent resource. A rain garden is not just a flower bed; it is a living, breathing biological filter and a subterranean reservoir. It mimics the natural ways of the forest floor, using the power of gravity and the wisdom of deep-rooted plants to pull water into the deep soil layers where it belongs. This is the difference between an isolated barrel that sits idle once full and an integrated system that grows more efficient with every passing season.
Building one of these systems is a handshake with the future. It requires a bit of sweat and some honest dirt under the fingernails, but the result is a landscape that stands resilient against both flood and drought. Whether you are looking to dry out a soggy basement or simply want to do right by the patch of earth you call home, understanding how to manage runoff with a rain garden is an essential skill for the modern steward.
Building A Rain Garden For Runoff Control
A rain garden is a shallow, purposefully designed depression in the landscape created to collect and soak up rainwater runoff from roofs, driveways, or sidewalks. Unlike a pond, a rain garden is meant to be dry most of the time. It only holds water for a short period—usually no more than 24 to 48 hours—allowing the moisture to seep slowly through the soil profile and recharge the groundwater table.
In real-world terms, imagine your roof as a giant funnel. During a typical storm, hundreds or even thousands of liters (gallons) of water pour off that surface. Without a plan, that water rushes over your lawn, picks up pollutants, and heads for the street. A rain garden acts as a strategic “speed bump.” It intercepts that flow, holding it in a level basin where plants and soil microbes can break down pollutants and nourish the earth. It is a simple technology that uses the land’s own geometry to solve a modern drainage problem.
These gardens are particularly useful in urban and suburban environments where “impervious surfaces”—things like concrete and shingles—prevent rain from soaking in naturally. By creating a dedicated space for infiltration, you are essentially restoring the natural hydrology of your site. You are giving the rain a place to “park” so it can do its work without causing erosion or overwhelming municipal sewer systems.
How It Works: The Mechanics of Infiltration
The success of a rain garden depends on three main components: the Inflow, the Basin, and the Overflow. Each part must be sized and placed with care to ensure the system handles the volume of water your property generates without becoming a stagnant bog.
1. Siting Your Garden
You cannot simply dig a hole anywhere and expect it to work. Proper placement is the first law of water management. The garden should be at least 3 meters (10 feet) away from your home’s foundation to prevent basement seepage. It should also be located downhill from your downspouts or the area of runoff you wish to treat. Avoid placing it over septic fields, utility lines, or under the “drip line” of large, established trees, as the extra water can drown their roots or the digging can damage them.
2. Calculating the Size
To size your garden correctly, you first need to know the “drainage area”—the surface area of the roof or driveway that will feed into the garden. A common rule of thumb is the 5:1 ratio. This means for every 5 square meters (54 square feet) of drainage area, you should have 1 square meter (11 square feet) of rain garden. If your soil has a high clay content, you may need to make the garden larger or deeper to compensate for slower drainage.
3. The Percolation Test
Before you dig, you must know if your soil can actually “breathe” water. Dig a hole about 20 centimeters (8 inches) deep and fill it with water. If it drains within 24 hours, you have good soil for a rain garden. If the water is still there after two days, you are essentially looking at a site for a pond, not a rain garden. In such cases, you will need to either find a new location or heavily amend the soil with sand and organic matter to create an “engineered” soil mix.
4. The Soil Recipe
Most native soils need a bit of help to become efficient filters. A standard “engineered” mix for a high-performing rain garden is often 60% coarse sand, 20% compost, and 20% topsoil. This ratio provides the perfect balance: the sand ensures fast drainage (macro-pores), the compost provides nutrients and microbial life, and the topsoil gives the plants enough structure to hold their roots. This mix allows the garden to handle a heavy downpour of 25 millimeters (1 inch) and have it gone by the next morning.
Benefits of a Sinking System
The practical advantages of a rain garden extend far beyond simple drainage. When you choose to sink water into the soil rather than store it in a plastic tank, you are engaging with a much larger biological cycle. Here are the measurable benefits of this approach:
- Groundwater Recharge: Most of our drinking water comes from aquifers deep underground. By sinking rain on-site, you are directly refilling those reservoirs that modern paving has cut off.
- Natural Filtration: The first flush of rain often carries oils, heavy metals, and fertilizers. The roots of rain garden plants and the microbes in the soil act as a living filter, trapping and breaking down these toxins before they reach the water table.
- Flood Mitigation: If every house in a neighborhood had a rain garden, the peak flow of water into local streams during a storm would be drastically reduced, preventing downstream flooding and erosion.
- Habitat Creation: Rain gardens, when planted with native species, become islands of biodiversity. They provide nectar for pollinators and seeds for birds, creating a thriving ecosystem in what might otherwise be a sterile lawn.
- Reduced Maintenance: Once established, a rain garden requires far less care than a traditional lawn. There is no mowing, and the deep-rooted native plants are naturally adapted to survive both the wettest and driest parts of the year.
Challenges and Common Mistakes
The most frequent error people make is over-mulching. While 5 to 7 centimeters (2 to 3 inches) of hardwood mulch is great for a new garden, adding a fresh layer every year can eventually choke the plants and actually reduce the soil’s ability to absorb water. Use shredded hardwood, which “interlocks” and won’t float away during a heavy storm.
Another pitfall is ignoring the overflow. Every rain garden will eventually meet a storm it cannot hold. If you don’t design a clear, armored exit point—usually a low spot in the berm lined with stones—the water will find its own way out, often eroding your garden or flooding a neighbor’s yard. Think of the overflow as the safety valve on a steam engine; it’s better to have it and not need it than to need it and not have it.
Finally, compaction is the enemy of infiltration. During construction, avoid walking or driving heavy machinery inside the garden basin. Once the soil is squashed flat, the tiny air pockets that hold water are gone. If you must enter the garden, use a wide board to distribute your weight, or work from the edges whenever possible.
Limitations: When a Rain Garden is Not the Answer
Rain gardens are powerful tools, but they aren’t universal solutions. There are certain environmental and practical boundaries where this method may fail or even cause harm.
If your property has a slope steeper than 12%, a simple rain garden can become a landslide risk. Water is heavy, and saturating a steep hillside can cause the soil to lose its grip on the bedrock. In these cases, a series of terraced “check dams” or a professional bioswale is a safer choice. Similarly, if your groundwater table is naturally very high (less than half a meter or two feet from the surface), a rain garden will simply stay wet all year, creating a breeding ground for mosquitoes rather than a functioning filter.
Furthermore, rain gardens should not be used to treat highly contaminated runoff, such as water from a commercial grease trap or a chemical storage area, without professional engineering. While soil is a great filter, it can become “saturated” with toxins over time, turning your garden into a hazardous waste site. For standard residential roofs and driveways, however, the natural filtration of the soil is more than sufficient.
Comparison: Integrated Swale vs. Isolated Barrel
It is helpful to look at how different water management strategies stack up against one another. While rain barrels are the most common entry point for water conservation, they represent a different philosophy than the integrated rain garden.
| Feature | Isolated Rain Barrel | Integrated Rain Garden |
|---|---|---|
| Storage Capacity | Limited (usually 200–400 liters / 50–100 gallons) | Virtually unlimited (limited only by soil porosity) |
| Maintenance | High (must be emptied before every storm) | Low (seasonal weeding and pruning) |
| Water Quality | Potential for stagnation and mosquito larvae | Naturally filtered by soil and microbes |
| Longevity | Plastic degrades in UV light (10–15 years) | Improves over time as roots deepen (decades) |
| Primary Use | Hand-watering potted plants | Recharging groundwater and feeding deep roots |
The rain barrel is a “cup” you fill and empty. The rain garden is a “sponge” that becomes part of the earth’s natural plumbing. For the serious practitioner, the best system often involves both: a barrel for the kitchen herbs and a rain garden to handle the massive volumes of water that the barrel can’t possibly contain.
Practical Tips and Best Practices
When you are ready to put shovel to earth, keep these best practices in mind to ensure your garden thrives from day one:
- Plant in Zones: Divide your garden into three zones based on moisture. The “Basin” (center) should have plants that love “wet feet.” The “Slope” needs plants that can handle both wet and dry conditions. The “Top” (rim) should be reserved for drought-tolerant species.
- Use Native Plants: Native species have roots that can reach 3 to 4 meters (10 to 15 feet) deep. These deep channels act as “straws” that pull water down into the subsoil, significantly increasing the garden’s infiltration rate over time.
- Armor the Inflow: Where the water enters the garden, place a few large, flat stones (river cobbles). This prevents the rushing water from washing away your mulch and soil when the storm first hits.
- Be Patient: It takes about two to three years for a rain garden to reach its full potential. During the first year, you will need to water it during dry spells to help the native plants establish their deep roots. Once they are set, they will take care of themselves.
Advanced Considerations: Scaling and Chains
For those with larger properties or more complex drainage issues, a single rain garden may not be enough. Advanced practitioners often move toward multi-cell systems or “treatment trains.” This involves connecting multiple rain gardens in a series using shallow, vegetated channels known as swales.
In this setup, the first garden (the “forebay”) captures the heaviest sediment and debris. When it fills, the water overflows into a second, larger garden that handles the bulk of the infiltration. This tiered approach is incredibly efficient because it spreads the water over a larger area, reducing the pressure on any single basin. If you have a long, sloping property, you can essentially create a “staircase” of water-catching cells that ensures not a single drop of rain leaves your land as runoff.
Another advanced technique is the use of an underdrain. In areas with extremely heavy clay soil where infiltration is very slow, a perforated pipe wrapped in gravel is placed at the bottom of the garden. This pipe connects to the municipal storm system. It allows the garden to filter the water through 60 centimeters (2 feet) of soil before slowly releasing the “clean” water into the drain, satisfying local codes while still providing the ecological benefits of a rain garden.
Example Scenario: The suburban “Wet Spot”
Consider a standard 1,000 square foot (93 square meter) roof in a region that gets moderate rainfall. During a 1-inch (25 mm) rain event, that roof produces roughly 600 gallons (2,270 liters) of water. In a typical yard, this water might pool against the foundation or create a muddy mess in the lawn.
By installing a 150 square foot (14 square meter) rain garden with an 8-inch (20 cm) depth, the homeowner creates a basin capable of holding that entire volume at once. Using the 60:20:20 soil mix, the water level will drop by 2 or 3 inches every hour. By the time the sun comes up the next morning, the surface is dry, the plants are hydrated, and 600 gallons of clean water have been tucked safely into the groundwater table. The “wet spot” in the yard is gone, replaced by a vibrant garden of Blue Flag Iris and Switchgrass.
Final Thoughts
A rain garden is a testament to the idea that we don’t have to fight nature to live comfortably. By understanding the flow of water across our land and providing a place for it to rest, we solve drainage problems with life rather than concrete. It is a return to a more thoughtful way of living—one where we recognize that the soil is our greatest asset and that every rain is a gift to be kept, not a waste to be discarded.
As you begin your project, remember that the goal isn’t perfection; it’s progress. Even a small, simple depression planted with a few native grasses is doing more for the environment than a patch of thirsty turf. Start where you are, use what you have, and let the earth do the rest. Your garden, and the generations that follow, will thank you for it.
Once you have mastered the rain garden, you might find yourself looking at the rest of your landscape with new eyes. You may see opportunities for bioswales along your driveway or permeable paths that let the earth breathe. Each of these steps is a move toward a truly integrated, self-sustaining homestead that honors the ancient wisdom of the land.