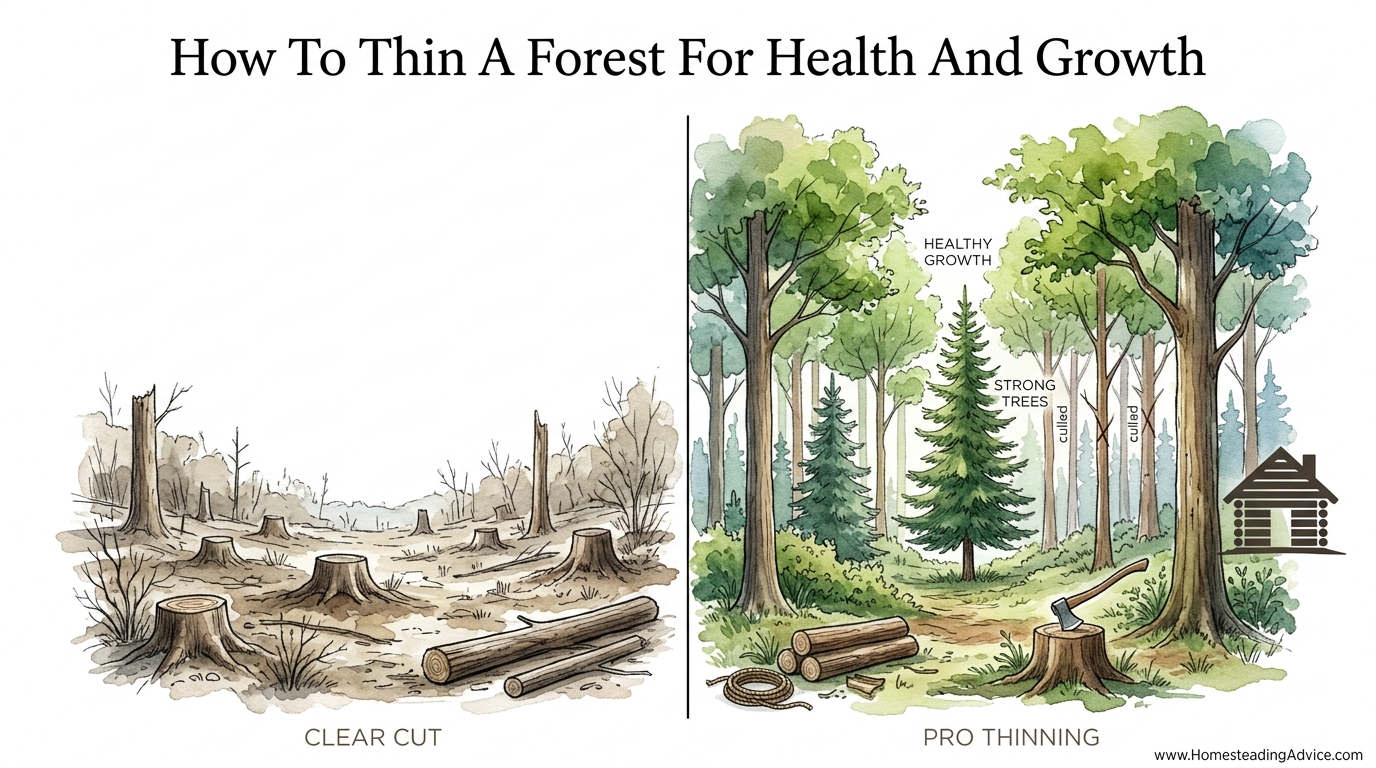
Are you turning your backyard into a barren construction site or a self-sustaining ecosystem? Most woodlot owners think ‘clearing’ means removing everything to make it look tidy. Real pros know that the secret to a high-value, fast-growing forest isn’t what you take, but what you leave behind. Learn how to thin for ecological health and long-term timber value rather than total destruction.
Working the land is a responsibility that spans generations. It requires a steady hand, a sharp eye, and the patience to watch a tree grow for fifty years before even thinking about a harvest. When you step into a crowded stand of timber, you are not just a person with a chainsaw; you are a steward of a complex, living network that relies on your wisdom to thrive.
Thinning a forest is an art form that mirrors the practices of our ancestors who understood that a crowded forest is a stagnant forest. In the old days, woodsmen knew that if you let too many stems compete for the same patch of dirt, nobody wins. The trees grow tall and spindly, sunlight never touches the forest floor, and the entire system becomes a tinderbox waiting for a single spark.
True forest management is about balance. It is about recognizing the “winners” in your woods and giving them the resources they need—sunlight, water, and soil nutrients—to reach their full potential. This guide will walk you through the grit and the science of thinning your woodlot the right way, ensuring that your forest remains healthy, resilient, and valuable for the next century.
How To Thin A Forest For Health And Growth
Forest thinning is the strategic removal of specific trees to improve the growth, health, and vigor of the remaining “residual” stand. Think of it like weeding a garden, but on a much larger and more permanent scale. In an unmanaged forest, trees often grow too close together, leading to intense competition where every tree struggles to survive, and none truly thrive.
This competition occurs both above and below the ground. Above ground, tree crowns (the leafy tops) fight for sunlight. Below ground, root systems compete for limited water and minerals. When a forest is overstocked, the growth of individual trees slows down significantly. This state of “stagnation” makes trees more susceptible to pests, diseases, and environmental stressors like drought.
Professional thinning acts as a release valve. By removing the less desirable or weaker trees, you “release” the high-quality trees from competition. This allows the remaining trees to expand their crowns and root systems, leading to faster diameter growth and improved overall health. In the real world, this is used to create fire-resilient landscapes, enhance wildlife habitats, and increase the eventual timber value of a woodlot.
Historically, thinning was often done naturally by low-intensity fires or selective grazing. Today, woodlot owners must take on this role manually. Whether you are managing five acres (2 hectares) or five hundred, the principles remain the same: identify the best trees, determine how much space they need, and remove the competition with surgical precision.
The Mechanics of Tree Selection and Spacing
Knowing which tree to cut is the most critical skill a woodlot owner can possess. Selecting the wrong trees can lead to “high-grading,” a mistake that leaves the forest genetically weak and low in value. To avoid this, you must understand the hierarchy of the forest canopy and the specific metrics used to measure tree density.
Understanding Crown Classes
Trees in a forest stand are categorized by their position in the canopy. This hierarchy determines how much sunlight a tree receives and how it will respond to thinning. Professional foresters generally recognize four main classes:
- Dominant: These are the largest trees with crowns that extend above the general level of the canopy. They receive full sunlight from above and partial sunlight from the sides.
- Codominant: These trees form the main level of the canopy. They receive full light from above but comparatively little from the sides. These are often the best candidates for “crop trees.”
- Intermediate: These trees are shorter and receive only a little light from above through holes in the canopy. They are often thin and have small crowns.
- Suppressed (Overtopped): These trees are entirely below the main canopy and receive almost no direct sunlight. They are often stunted and grow very slowly.
The D+x Rule for Spacing
A common “pioneer-style” rule of thumb for determining how much space to leave between trees is the D+x rule. In this formula, “D” represents the diameter of the tree in inches at breast height (DBH), and “x” is a constant factor—usually 6, 7, or 8—depending on the species and management goals.
For example, using the D+6 rule: If you have a high-quality oak with a DBH of 10 inches (25.4 cm), you would add 6 to that number, giving you 16. This means the next tree should be approximately 16 feet (4.8 meters) away. This simple calculation provides a consistent way to ensure your “leave trees” have enough room to expand their crowns without being crowded out again in just a few years.
Measuring Basal Area (BA)
For those looking to be more precise, Basal Area is the standard metric. It represents the cross-sectional area of all tree stems at breast height (4.5 feet or 1.37 meters) over one acre (0.4 hectares) of land. You can calculate the BA of an individual tree using the formula: $BA = 0.005454 \times DBH^2$.
Summing these values across a sample plot tells you if the forest is overstocked. A typical hardwood stand might be considered ready for thinning when its basal area exceeds 100 to 120 square feet per acre (23 to 27 square meters per hectare). Thinning typically aims to reduce this back down to a “target” BA of 60 to 80 square feet per acre (14 to 18 square meters per hectare), depending on the species.
Step-By-Step Thinning Techniques
Once you have assessed your stand and identified your goals, it is time to get to work. Thinning is not a one-size-fits-all process; the technique you choose depends on the age of your forest and what you hope to achieve.
1. Pre-Commercial Thinning (PCT)
This is usually done in young stands where the trees are too small to have market value. The goal here is purely investment. You are “weeding” the forest to ensure the best trees get a head start. In PCT, the felled trees are often left on the forest floor to rot, which returns nutrients to the soil and provides habitat for small wildlife. Use a brush saw or a small chainsaw to remove suppressed and intermediate trees that are crowding your future timber trees.
2. Crop Tree Management (CTM)
Crop Tree Management is a highly effective method for small woodlot owners. Instead of looking at the whole forest, you focus on 30 to 50 “crop trees” per acre (75 to 125 per hectare). These are your best specimens—straight, healthy, and high-value species like White Oak, Black Walnut, or Sugar Maple. You perform a “crown release” by cutting any tree whose crown touches the crown of your crop tree. A “four-sided release” removes competition from all sides, while a “three-sided release” is often safer to prevent wind-throw in sensitive stands.
3. Low Thinning (Thinning from Below)
This method involves removing trees from the lower crown classes (Suppressed and Intermediate). You are essentially cleaning up the “understory” to reduce fire risk and direct all resources to the dominant and codominant trees. This mimics the natural process of forest self-thinning but accelerates it by decades. It is the safest method for beginners because it doesn’t significantly change the structure of the main canopy.
4. Crown Thinning (Thinning from Above)
This is a more advanced technique where you remove some of the larger, dominant trees to favor the best codominant trees. This is done when you have several large trees competing for the same space. By removing a “coarse” dominant tree with poor form (like one with many big branches or a fork), you allow a straighter, higher-quality tree next to it to grow even faster. This requires a keen eye for “form” and future log quality.
The Practical Benefits of Forest Thinning
The rewards of thinning are both immediate and long-term. While it requires hard work and an upfront investment of time, the transformation of the landscape is profound.
- Increased Growth Rates: Residual trees often double their diameter growth rate after a proper thinning. What might have taken 80 years to reach harvest size can be achieved in 50.
- Climate and Drought Resilience: With fewer mouths to feed, the remaining trees have better access to ground water. Studies show that thinned forests survive extreme droughts far better than overcrowded stands.
- Fire Safety: By removing “ladder fuels” (small trees and low branches), you make it much harder for a ground fire to climb into the canopy and become a catastrophic crown fire.
- Biodiversity and Habitat: Opening the canopy allows sunlight to reach the forest floor. This stimulates the growth of forbs, grasses, and shrubs, providing food and cover for deer, turkey, and songbirds.
- Timber Quality: Thinning allows you to select for trees with the best genetics—straight trunks, few low branches, and high-value species. This ensures that when you do eventually harvest, the logs are of “veneer” or “sawlog” quality rather than just pulpwood or firewood.
Challenges and Common Mistakes to Avoid
Even with the best intentions, it is easy to damage a woodlot if you don’t follow best practices. Forestry is a slow-motion science; mistakes made today may not be fully visible for ten years.
High-Grading (The “Bucket of Coins” Trap): This is the most common mistake. It happens when a landowner cuts only the best, most valuable trees and leaves the “junk” behind. Imagine a bucket of coins: if you only take the quarters and dimes, you are eventually left with nothing but pennies. In a forest, this leaves you with genetically inferior trees that will never grow into valuable timber. Always “take the worst, first.”
Epicormic Branching: If you thin too aggressively, especially in hardwoods like Oak or Cherry, the sudden exposure to intense sunlight can cause the tree to sprout thousands of tiny new branches along its trunk. These are called epicormic shoots. They create knots in the wood, destroying the value of the future sawlog. To avoid this, never release a tree’s trunk to more than 50% additional sunlight in a single thinning cycle.
Wind-Throw and Sunscald: Trees that have grown up in a dense stand rely on their neighbors for support and shade. If you remove too many neighbors at once, the remaining trees may be blown over in the next big storm (wind-throw) or have their bark damaged by the sudden heat of the sun (sunscald). Gradual thinning—removing no more than 30% of the basal area at a time—is the safest approach.
Limitations and Environmental Constraints
There are times and places where thinning might not be the best option, or where extreme caution is required. Understanding these boundaries is part of being a professional-level woodlot manager.
Soil Compaction and Steep Slopes: If your woodlot is on very steep terrain or has wet, clay-heavy soils, bringing in heavy equipment can cause irreparable damage. Compacting the soil kills the fine “feeder roots” that trees need to breathe. In these cases, manual thinning with chainsaws or using low-impact methods like ATV logging is mandatory. If the slope is greater than 35%, even manual felling becomes a high-risk activity that may require specialized professional help.
Small Woodlot Economics: If your property is less than 10 acres (4 hectares), it may be difficult to find a commercial logger willing to do a “thinning” harvest. Commercial operations usually need a high volume of wood to be profitable. This means the small woodlot owner must be prepared to do the work themselves or pay a professional for “Timber Stand Improvement” (TSI) services rather than expecting to make a profit from the first cut.
Comparison: Pro Thinning vs. Alternatives
To truly appreciate professional thinning, it helps to see how it stacks up against other common land-clearing methods. The goal of thinning is “stewardship,” whereas other methods often prioritize immediate profit or convenience.
| Feature | Pro Selective Thinning | Clear Cutting | High-Grading (Selection Cut) |
|---|---|---|---|
| Long-Term Value | Highest; focuses on quality. | Resets the clock; low immediate value. | Lowest; degrades the forest. |
| Ecological Impact | Positive; improves health/resilience. | Drastic; creates early-succession habitat. | Negative; leaves “genetic junk.” |
| Fire Risk | Significantly reduced. | Initially high (slash), then low. | Often increased due to leftover debris. |
| Difficulty Level | High; requires skill and patience. | Moderate; requires heavy equipment. | Low; take the big ones and leave. |
| Regeneration | Enhances existing growth. | Complete restart (seedlings). | Stunted; undesirable species take over. |
Practical Tips and Best Practices
Success in the woods is a combination of the right tools and the right timing. Here are a few “grit-tested” tips for your next thinning project:
- Timing Matters: For most hardwoods, the best time to thin is during the late fall or winter when the sap is down and the ground is frozen. This prevents “bark slipping” on your leave trees and minimizes soil compaction. If you have Oak trees, avoid thinning in late spring and early summer to prevent the spread of Oak Wilt.
- The “Three-Sided” Rule: When releasing a crop tree, you don’t always need to cut every neighbor. Removing competition on just three sides provides plenty of growth release while keeping the tree protected from high winds on the fourth side.
- Manage Your Slash: The branches and tops you leave behind (slash) can be a fire hazard or an eyesore. Lop them down so they touch the ground; they will rot much faster and return nutrients to the soil. Alternatively, pile them to create “rabbit hotels” for wildlife.
- Use a “Biltmore Stick”: This simple, traditional tool is a wooden ruler used to estimate a tree’s DBH and height. It’s faster than a tape measure for rough thinning assessments and keeps you in touch with the old ways of the woods.
- Invest in PPE: A chainsaw doesn’t care about your experience level. Always wear chainsaw chaps, a helmet with a face shield, and ear protection. Professional thinning is a marathon, not a sprint—don’t let a moment of carelessness end your journey.
Advanced Considerations for the Serious Practitioner
Once you’ve mastered the basics of spacing and selection, you can begin to look at the forest as a holistic system. Advanced thinning takes into account things like carbon sequestration and nutrient cycling.
Nutrient Cycling: Some practitioners practice “Girdling” instead of felling. By cutting a ring through the bark and cambium layer of an undesirable tree, you kill it while leaving it standing. This creates “snags” which are essential for woodpeckers and owls. As the tree slowly dies and drops its branches, it releases nutrients into the soil over a decade rather than all at once. This mimics the natural death cycle of an old-growth forest.
Carbon Management: While thinning removes some carbon-storing biomass, the remaining trees grow so much faster that they often make up the difference within five to ten years. A thinned forest is a more stable carbon sink because it is less likely to be destroyed by a massive fire or insect outbreak, which would release all that stored carbon into the atmosphere instantly.
Example Scenario: The Overgrown Oak-Hickory Stand
Imagine you have a 40-year-old stand of mixed Oak and Hickory. It hasn’t been touched since it was a farm field. The trees are 6 inches (15 cm) in diameter and packed together like sardines, about 6 feet (1.8 meters) apart. The lower branches are dead, and the crowns are tiny tufts at the very top. The basal area is 140 square feet per acre (32 square meters per hectare).
Using Crop Tree Management, you identify the 40 straightest White Oaks. You walk around each one and identify its competitors—mostly suppressed Red Maples and crooked Hickories. You fell these competitors, focusing on a three-sided release. You also remove any diseased trees that are acting as “host” sites for fungi.
After two weeks of work, the basal area is down to 80 square feet per acre (18 square meters per hectare). Sunlight is finally hitting the forest floor. Five years later, you return to find that your White Oaks have grown two inches (5 cm) in diameter, while an unmanaged control plot nearby has barely grown half an inch (1.2 cm). You have effectively “bought” yourself 15 years of growth through a few weeks of labor.
Final Thoughts
Thinning a forest is one of the most rewarding tasks a landowner can undertake. It requires you to step out of the frantic pace of modern life and enter the “deep time” of the woods. You are making decisions today that will be visible in the rings of a tree a hundred years from now. By choosing to thin for health and growth rather than clear-cutting for a quick check, you are upholding an ancestral tradition of stewardship.
The goal is never perfection; the goal is resilience. A healthy forest is a diverse forest where the strong are given room to grow and the weak are returned to the earth to feed the next generation. As you work your way through your woodlot, remember that every cut is a choice. You are sculpting a living monument to self-reliance and ecological wisdom.
Don’t be afraid to start small. Take a single acre, identify your crop trees, and clear their crowns. Watch how the forest responds over the next few seasons. Once you see the explosion of life that follows a well-executed thinning, you will never look at a crowded stand of “tidy” trees the same way again. Experiment, learn the language of your particular patch of dirt, and leave the land better than you found it.